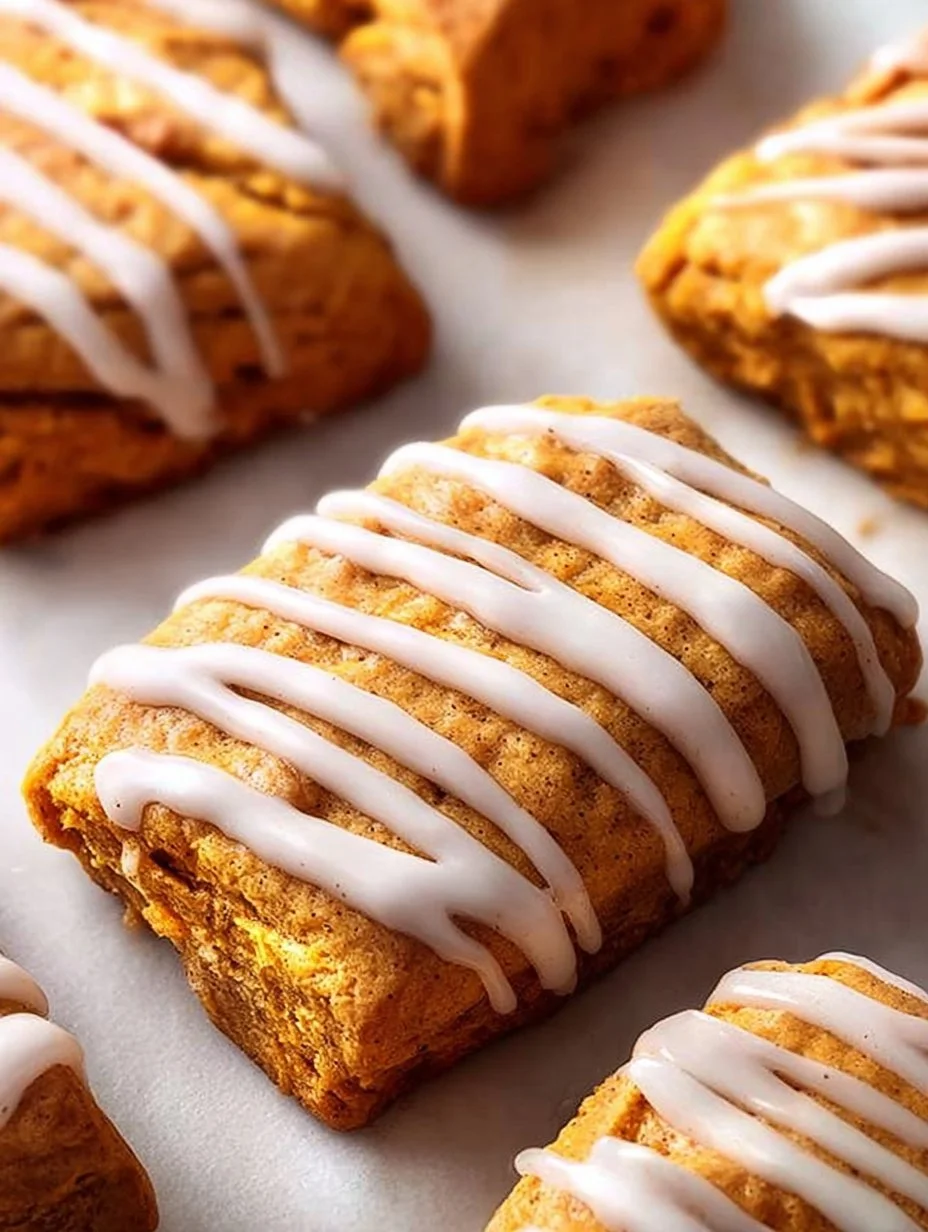
These simple Starbucks pumpkin scones arrive warm from the oven with a golden, crisp edge and a silky glaze that melts soft on your tongue. Chef Rita designed this recipe to strip away unnecessary steps while keeping the crumb tender, the flaky layers intact, and the warm spice profile balanced. The secret lies in cold butter and chilled wet ingredients that lock in those coveted flakes without developing toughness. Unlike dense, breadlike versions, these scones reward patience with a shattering exterior and a moist, pumpkin-scented interior. The double glaze, vanilla base with autumn spice stripes, adds visual appeal and aromatic depth. Whether you’re hosting a brunch or craving that café comfort at home, this copycat recipe delivers restaurant-quality results in about 35 minutes from start to finish. Pair them with a warm beverage for an afternoon moment that feels curated and calm.
Pro Tips from Chef Rita
- Chef Rita recommends working cold and fast: chill the wet mixture briefly before combining, keep butter in small dice, and handle the dough minimally to preserve air pockets and flakes.
- Use a bench scraper or dough cutter to fold and cut cleanly; uneven handling creates dense spots that interrupt the tender crumb.
- If your kitchen runs warm, refrigerate the shaped dough for 10 minutes before baking to prevent butter from melting into the flour.
- Glaze only when the scones are completely cool; warm scones cause the glaze to slide off or crack unevenly.
Table of Contents
Introduction
Simple Starbucks Pumpkin Scones arrive warm from the oven with a crisp edge and a satin glaze that melts soft on the tongue. This recipe pares back steps and ingredients to deliver that familiar café comfort while keeping the crumb tender and the spice profile balanced. The technique centers on cold butter and chilled wet ingredients to lock in flaky layers and a moist interior, an approach that rewards patience. Pair them with a slice of our Simple Starbucks Pumpkin Scones inspired loaf for an autumn spread that feels curated and calm.
Why This Recipe Works
Simple Starbucks Pumpkin Scones rely on two precise contrasts: very cold fat against minimally mixed wet ingredients. Keeping butter diced and the pumpkin mixture chilled stops gluten from developing and preserves distinct flakes, while a short fold brings the dough together without toughness. The leavening balance, baking soda with a touch of baking powder gives gentle lift and a fine crumb rather than large tunnels. A two-part glaze layers sweetness and spice visually and texturally, so each bite is glossy, slightly crackled, then silky.
Flavor and Texture
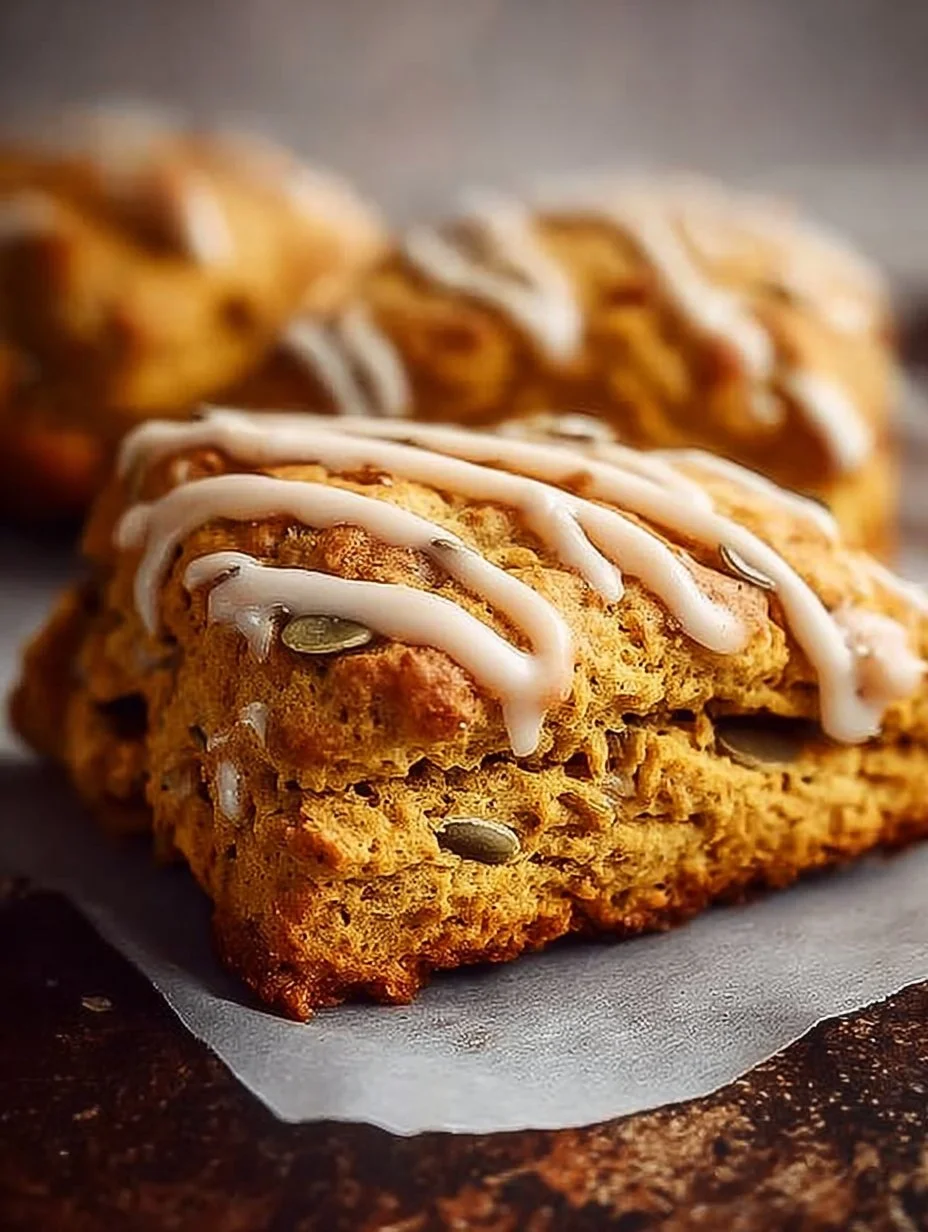
The first bite should offer a whisper of crunch at the rim, caramelized where butter kissed flour, then give into a creamy, pumpkin-scented interior. Cinnamon, nutmeg, ginger and cloves are calibrated to support the pumpkin without dominating: warmth rather than heat. The vanilla glaze smooths the spice and brightens the profile, while a narrower ribbon of pumpkin-spiced icing adds aromatic lift and a faint chew. Temperature contrast, serve slightly warm or at room temperature changes the mouthfeel, making the glaze soft or just set.
These scones hold visual balance too: clean square cuts, golden edges, and delicate white glaze that lets the pumpkin stripes read like a flourish. Texture-wise, the secret is cold ingredients and a light hand too much handling means a dense, breadlike scone; the right rhythm yields flaky layers and a tender center.
I also like to include a link to a companion loaf when serving; try the copycat pumpkin bread recipe for a coordinated table.
Convenience and Time
This is a compact recipe that rewards setup: chill the wet bowl and keep the butter cold and diced. Active hands-on time is moderate about 15 to 20 minutes while oven time is brief and reliable. There’s no yeast proofing, no lengthy creaming, and the glazing requires only a few whisk-strokes. The method scales well; double the batch and bake on two sheets for a brunch crowd without adding complexity. Cooling and glazing add passive time, but those waits are essential for neat, intact scones.
Diet Friendly Options
You can adapt these scones without changing their visual identity: swap dairy cream with full-fat coconut cream for the glaze or use a neutral oil-based spread in place of butter for a dairy-free version, keeping chilling steps the same. For lower sugar, reduce the white sugar modestly in the dough and balance glaze sweetness to taste; the pumpkin and spices provide much of the perceived sweetness. These small edits keep the scones’ character while accommodating preferences.
Ingredients
- 2 1/4 cups all-purpose flour
- 1/3 cup packed brown sugar
- 2 tbsp white sugar
- 1 tsp ground cinnamon
- 1/4 tsp ground cloves
- 1/4 tsp ground ginger
- 1/4 tsp ground nutmeg
- 1 tsp baking soda
- 1/2 tsp baking powder
- 1/4 tsp salt
- 1/2 cup unsalted butter, cold and diced
- 1/2 cup chilled pumpkin puree
- 1/4 cup cold milk
- 1 cold egg
- 1 tsp vanilla extract
- 1 cup powdered sugar
- 2, 3 tbsp heavy cream
- 1 tbsp powdered sugar
- 1/4 tsp pumpkin puree
- 1/4 tsp pumpkin pie spice
Step by Step Instructions
-
Preheat your oven to 400°F (200°C) and line a baking sheet with parchment paper or a silicone mat; set it aside. In a medium bowl, whisk together the chilled pumpkin puree, cold milk, cold egg, and vanilla extract until smooth. For the best scone texture, I like to place this mixed wet bowl back in the fridge to keep it extra cold while I work on the dry ingredients.
-
In a separate large bowl, combine the all-purpose flour, packed brown sugar, white sugar, ground cinnamon, ground cloves, ground ginger, ground nutmeg, baking soda, baking powder, and salt. Stir until all ingredients are uniformly distributed. Add the cold, diced unsalted butter to the bowl. Using a pastry cutter or your hands, work the butter into the dry mixture until it resembles coarse crumbs. Keeping the butter cold is key for flakey scones!
-
Make a well in the center of the dry ingredients and pour in the chilled pumpkin mixture from Step 1. Use a rubber spatula to gently mix until a soft dough forms, avoid overmixing so the scones stay tender. There may still be a bit of flour visible. Turn the dough onto a lightly floured surface and gently fold it over itself 2-3 times using a pastry scraper, until most of the flour is incorporated. Shape the dough into an 8×5 inch rectangle, about 1 inch thick. With a sharp knife, cut the dough into 6 squares. Place the squares on the prepared baking sheet.
-
Bake the scones in the preheated oven for 17, 18 minutes, until they are risen and lightly golden. Let the scones rest on the baking sheet for 10 minutes after baking, then transfer them to a wire rack to cool completely. I always let the scones cool properly before glazing they hold together better that way.
-
While the scones are cooling, make the glaze by whisking together the powdered sugar and 2 tablespoons of heavy cream in a medium bowl until smooth. If the glaze is too thick, add up to 1/2 tablespoon more heavy cream until you reach a spreadable consistency. This simple glaze is the perfect sweet complement, and I recommend tasting it to adjust the consistency before spreading.
-
Take 1 tablespoon of the vanilla glaze from Step 5 and transfer it to a small bowl. Add 1 tablespoon powdered sugar, 1/4 teaspoon pumpkin puree, and 1/4 teaspoon pumpkin pie spice, stirring well to combine. Place this spiced glaze in a small ziplock bag for piping. For extra autumn flavor, I use a little more spice if you like a bolder taste.
-
Once the scones are completely cool, spread 1.5, 2 tablespoons of the vanilla glaze from Step 5 over each scone and place them back on the cooling rack. Let the glaze set for 5, 10 minutes. Snip the tip off the bag with the spiced pumpkin glaze from Step 6 and drizzle it over the scones in decorative stripes. Allow the scones to set for another 15, 20 minutes to let the glazes firm up, then enjoy! I find this double-glazing step adds a beautiful and delicious finish.
Tips and Tricks for Success
Work cold and fast: chilling the wet mixture briefly and keeping butter cold yields flakes rather than a dense crumb. Use a bench scraper for clean folds and uniform cuts; handling the dough minimally preserves air pockets. If your kitchen is warm, chill the shaped dough for 10 minutes before baking to prevent butter melting. For even browning, rotate the sheet halfway through baking. Finish glazing only when the scones are fully cool to prevent sliding.
Ingredient Swaps
Butter can be replaced with a vegan block for dairy-free versions, keeping the ratio the same and maintaining cold temperatures. Swap heavy cream in the glaze for chilled coconut cream or plant-based creamer if needed; the texture will be slightly different but still glossy. For a nuttier note, replace 2 tbsp of flour with finely ground oat flour, but avoid altering the dough work too much to keep the scones’ silhouette intact.
Pairings and Serving Suggestions
Serve these scones with a hot milky coffee, a bright tea, or a simple pour-over to cut through the glaze’s sweetness. A smear of cultured butter or a thin layer of cream cheese enhances the pumpkin’s roundness without overloading the palate. For a small gathering, arrange whole scones on a linen-lined tray and offer petite bowls of extra spiced glaze and whipped cream on the side. The visual of the pumpkin stripes against white glaze reads elegant and seasonal.
Storage and Make Ahead Tips
Cool completely before storing to avoid sogginess; place in an airtight container layered with parchment for up to two days at room temperature, or refrigerate for up to five days. You can freeze baked, unglazed scones for up to two months; thaw fully, then warm for 5, 7 minutes at 300°F to refresh before glazing. Prepare the glazes a day ahead and keep chilled; whisk briefly before using to restore a glossy sheen.
Nutrition and Health Benefits
These scones offer pumpkin’s natural vitamins and fiber in a comforting, indulgent form; pumpkin puree contributes beta-carotene and moisture, reducing the need for excess fat. The recipe is not low-calorie, but small portioning and modest glaze help manage sugar and fat. Use canned pure pumpkin with no added sugars for the cleanest nutrition profile. For specific dietary needs, please consult a qualified health professional.
Mistakes to Avoid
Avoid warm butter or overworking the dough; both create dense, tough scones instead of flaky ones. Don’t skip chilling the wet mixture briefly warm ingredients make the butter meld and lose its structuring effect. Over-glazing while the scones are warm causes sliding and an unpolished finish. Finally, cut squares with a single decisive motion rather than sawing to keep edges defined and even.
Personal Closing Thought and Call to Action
Simple Starbucks Pumpkin Scones are a small ritual: a crisp crackle, a molten glaze, a quiet inhale of spice. Make one tray for yourself on a slow morning or double it for company; either way, the technique is forgiving and the results are quietly impressive. If you try this recipe, share a photo and tag the collection to keep the conversation going.
Conclusion
Simple Starbucks Pumpkin Scones present a calm, refined take on a classic café treat, balancing crisp edges and a silky glaze with restrained spice. If you’d like a different copycat perspective or another tested version, explore this external adaptation at Simple Starbucks Pumpkin Scones for additional notes and variations.
FAQ
What is the preparation time for this recipe?
The preparation time usually takes about 15 to 20 minutes depending on experience and equipment.
Can I substitute any ingredients?
Yes, simple substitutions are possible depending on dietary needs or availability.
Is this recipe suitable for specific diets?
This recipe can be adapted with small changes depending on preferences.
How should leftovers be stored?
Store leftovers in an airtight container in the refrigerator and consume within two to three days.
Can I prepare this recipe in advance?
Many steps can be prepared ahead of time to simplify busy cooking days; you can also freeze baked and unglazed Simple Starbucks Pumpkin Scones for later enjoyment.

Simple Starbucks Pumpkin Scones
Warm and tender pumpkin scones with a crisp edge and silky glaze, perfect for autumn.
Total Time: 38 minutes
Yield: 6 servings 1x
Ingredients
Scale
- 2 1/4 cups all-purpose flour
- 1/3 cup packed brown sugar
- 2 tbsp white sugar
- 1 tsp ground cinnamon
- 1/4 tsp ground cloves
- 1/4 tsp ground ginger
- 1/4 tsp ground nutmeg
- 1 tsp baking soda
- 1/2 tsp baking powder
- 1/4 tsp salt
- 1/2 cup unsalted butter, cold and diced
- 1/2 cup chilled pumpkin puree
- 1/4 cup cold milk
- 1 cold egg
- 1 tsp vanilla extract
- 1 cup powdered sugar
- 2, 3 tbsp heavy cream
- 1 tbsp powdered sugar
- 1/4 tsp pumpkin puree
- 1/4 tsp pumpkin pie spice
Instructions
- Preheat your oven to 400°F (200°C) and line a baking sheet with parchment paper.
- In a medium bowl, whisk together the chilled pumpkin puree, cold milk, cold egg, and vanilla extract until smooth. Chill again for best texture.
- In a large bowl, combine all-purpose flour, brown sugar, white sugar, cinnamon, cloves, ginger, nutmeg, baking soda, baking powder, and salt. Add cold, diced unsalted butter and mix until it resembles coarse crumbs.
- Make a well in the center of the dry mixture and pour in the chilled pumpkin mixture. Mix gently until a soft dough forms. Fold over lightly a few times on a floured surface, then shape into an 8×5 inch rectangle and cut into 6 squares.
- Place the squares on the baking sheet and bake for 17, 18 minutes until lightly golden. Let rest for 10 minutes before transferring to a wire rack to cool.
- For the glaze, whisk powdered sugar and 2 tbsp of heavy cream until smooth, adding more cream if needed. Allow scones to cool completely before glazing.
- Spread the vanilla glaze over each scone, then drizzle with a spiced pumpkin glaze made from the remaining ingredients.
- Let the glazes set for 15-20 minutes before serving.
Notes
Keep ingredients cold for flaky scones. Best enjoyed fresh or within two days.
- Prep Time: 20 minutes
- Cook Time: 18 minutes
- Category: Baked Goods
- Method: Baking
- Cuisine: American
- Diet: Vegetarian
Nutrition
- Serving Size: 1 scone
- Calories: 300
- Sugar: 12g
- Sodium: 350mg
- Fat: 15g
- Saturated Fat: 9g
- Unsaturated Fat: 6g
- Trans Fat: 0g
- Carbohydrates: 40g
- Fiber: 2g
- Protein: 4g
- Cholesterol: 30mg
Frequently Asked Questions
Can I make pumpkin scones ahead of time?
Yes. Bake the scones up to three days ahead and store them in an airtight container at room temperature. Glaze just before serving for the best texture. You can also freeze unbaked scones on a tray, then bake directly from frozen, adding 2-3 minutes to the baking time. Glazed scones also freeze well for up to one month.
Why are my scones dense or breadlike?
Overmixing the dough develops gluten and traps steam unevenly, creating a tight crumb. Keep your wet ingredients cold, work quickly, and stop mixing the moment flour disappears. Use a light hand when folding. If your kitchen is warm, chill the shaped dough briefly before baking to prevent butter from melting prematurely into the flour.
Can I use canned pumpkin puree instead of fresh?
Absolutely. Canned pumpkin puree is consistent, convenient, and delivers the same flavor and moisture as fresh puree. Make sure you use pure pumpkin puree, not pumpkin pie filling, which contains added sugar and spices that will throw off the recipe’s balance and texture.
What is the best way to cut pumpkin scones?
Shape the dough into a thin rectangle, then use a sharp chef’s knife or bench scraper dipped in water or flour to cut clean, even squares. Wet or floured tools reduce drag and prevent compression at the edges. Avoid a sawing motion; instead, press down in one smooth motion for neat, intact scones that bake evenly.
How do I make the glaze dairy-free?
Substitute heavy cream with full-fat canned coconut cream or a plant-based creamer in the same ratio. The texture will be slightly thicker or looser, so adjust the liquid gradually until you reach a spreadable consistency. Taste and balance the sweetness of powdered sugar to your preference, as non-dairy liquids can mask or alter perceived sweetness.
Final Thoughts
These simple pumpkin scones bring café-quality baking into your kitchen without fuss or fail. Chef Rita loves serving them alongside other autumn favorites like our fluffy or quick breads for a coordinated table spread. Once you master the cold-butter technique, you’ll find yourself baking these year-round, swapping seasonal spices and glazes to match your mood. Store extras in an airtight container for three days, or freeze the baked scones for up to a month. Warm them gently before serving to restore that silky glaze and tender crumb. Your family and guests will taste the care in every bite.