Table of Contents
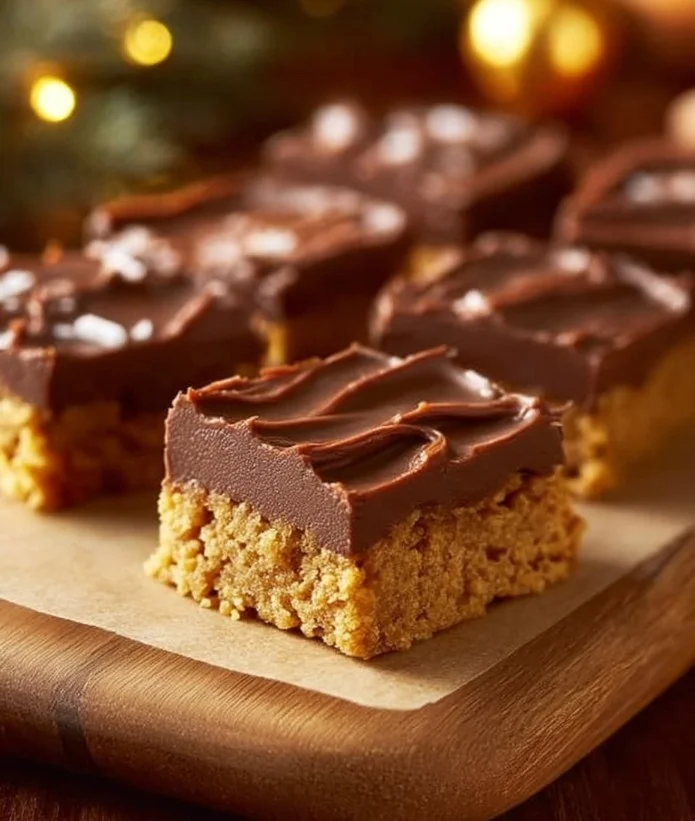
The holiday season is approaching, a time filled with joy, celebration, and the delightful aroma of baked goods wafting through homes. One of my cherished recipes that never fails to impress during this season is the delectable Holiday Cookie Bars. They combine the richness of chocolate, the crunch of nuts, and the sweet, buttery flavor that is perfect for any gathering.
Why Choose This Recipe
Holiday Cookie Bars are more than just another dessert; they are a sweet celebration of the season. They offer:
- Versatile Flavors: You can customize them based on your favorite mix-ins or seasonal themes.
- Easy Preparation: There’s no need for elaborate techniques or equipment.
- Crowd-Pleasing Goodness: Perfect for sharing, these bars disappear quickly at family gatherings or holiday parties.
For a broader selection of sweet delights, check out our Desserts category.
Flavor & Texture
One of the highlights of these Holiday Cookie Bars is their incredible flavor profile. The combination of brown sugar and granulated sugar creates a delightful sweetness balanced by the rich taste of chocolate chips. The texture is a mouthwatering blend of chewy, soft, and a slight crunch if you choose to add nuts. Each bite is a delightful experience that embodies the warmth and cheer of the holidays.
Convenience & Time
This recipe is both simple and quick, making it an excellent choice for busy holiday preparations. In just under 30 minutes of active time, you can have a batch of warm, gooey cookie bars out of the oven. Plus, the clean-up is a breeze, allowing you more time to enjoy the festivities.
Diet-Friendly Options
While these Holiday Cookie Bars are indulgent, they can also be adapted to fit various dietary preferences. You can use gluten-free flour for a gluten-free version or substitute some of the sugar with an alternative sweetener. Always ensure to check ingredient labels to maintain dietary restrictions. Explore more Recipes by Diet for additional inspiration.
Optional: Cultural Background
Cookie bars as a dessert may originate from the classic cookie tradition but have evolved into a more convenient form that is ideal for group settings. Their widespread popularity reflects the communal spirit of the holidays, encouraging sharing and togetherness.
Ingredients
- 2 cups all-purpose flour
- 1 cup unsalted butter, softened
- 1 cup granulated sugar
- 1 cup brown sugar, packed
- 2 large eggs
- 1 teaspoon vanilla extract
- 1 teaspoon baking soda
- 1/2 teaspoon salt
- 2 cups chocolate chips
- 1 cup chopped nuts (optional)
Step-by-Step Instructions
- Preheat your oven to 350°F (175°C) and grease a 9×13 inch baking pan.
- In a large bowl, cream together the softened butter, granulated sugar, and brown sugar until you get a smooth mixture.
- Beat in the eggs one at a time, followed by the vanilla extract.
- In another bowl, combine the flour, baking soda, and salt. Gradually mix this dry blend into the buttery mixture until just combined.
- Gently fold in those delightful chocolate chips and nuts, if you’re adding them.
- Spread the batter evenly into the prepared pan, making sure it reaches all corners!
- Bake for 20 to 25 minutes in the preheated oven, until the edges turn a lovely golden brown.
- Once baked, allow the bars to cool completely before cutting them into squares.
- For a delightful treat, store the bars in the freezer and let them thaw for about 10 minutes before serving.
Tips & Tricks for Success
Timing & Texture
Always keep an eye on the baking time; ovens can vary. The bars should be golden brown at the edges but remember they will continue to cook slightly after being removed from the oven.
Ingredient Swaps
You can swap the chocolate chips for white chocolate or butterscotch chips for a different flavor. Various nuts can also add uniqueness to your bars; pecans, walnuts, or even dried fruits like cranberries work wonderfully.
Make it Fool-Proof
Make sure your butter is softened but not melted. This helps achieve that perfect creamy texture when mixed.
Creative Variations
Try adding mint extract for a festive twist or sprinkle some sea salt on top for an added complexity. You can even drizzle melted chocolate over the top once cool for an eye-catching finish.
15-Minute Version
In a hurry? Use pre-made cookie dough instead of making it from scratch. Spread it in the pan and bake according to package instructions for a faster but equally delicious result.
Healthy Option
For a healthier alternative, use whole wheat flour and less sugar. You can also replace butter with coconut oil for a lower-saturated-fat option.
For more tips on healthy baking and ingredient substitutions, visit Healthline for expert advice.
Pairings & Serving Suggestions
What to Serve With It
These cookie bars pair wonderfully with a scoop of vanilla ice cream or a dollop of whipped cream. A hot cup of cocoa or spiced cider can elevate the entire dessert experience.
Occasions & Presentation
Presentation is key; for holiday gatherings, cut the bars into festive shapes and dust with powdered sugar. Serve them in a beautiful serving dish to impress your guests.
Storage & Make-Ahead Tips
Store your Holiday Cookie Bars in an airtight container at room temperature for up to a week. You can also freeze them for later indulgence; they can last for up to three months in the freezer.
Nutrition & Health Benefits
While indulgent, these cookie bars can provide a moment of joy amidst the holiday hustle. Chocolate chips offer some antioxidants, and nuts can provide healthy fats. Moderation is key to enjoying these delightful treats.
Mistakes to Avoid
Be cautious not to overmix the batter; this can lead to tougher bars. Also, avoid underbaking; cool bars won’t have the right texture and might fall apart.
Hosting & Presentation Tips
Creating a festive table for serving your cookie bars can be an enjoyable task! Add garlands or themed decorations that align with the holiday spirit, creating a delightful atmosphere.
FAQs
1. Can I make these cookie bars in advance?
Yes! Prepare and bake them a day or two ahead of your gathering for easy serving.
2. What can I substitute for eggs?
You can use flax eggs or applesauce as a replacement if you’re avoiding eggs.
3. Can I use alternative sweeteners?
Absolutely! Sweeteners like honey or stevia can be great alternatives, although they may change the overall taste and texture.
Personal Closing Thought + Call-to-Action
I hope you enjoy baking these Holiday Cookie Bars as much as I do. They are bound to become a traditional favorite in your holiday repertoire! Don’t forget to share this recipe with friends and family, and bring a piece of joy to their holiday celebrations. Happy baking!
With these Holiday Cookie Bars on your baking list, you’re sure to make this holiday season a little sweeter! Enjoy!
Print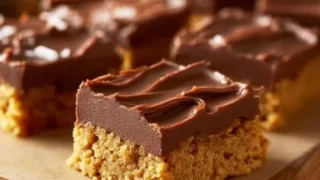
Holiday Cookie Bars
Delightful Holiday Cookie Bars combining chocolate, nuts, and a sweet buttery flavor, perfect for any gathering.
- Total Time: 40 minutes
- Yield: 24 servings 1x
Ingredients
- 2 cups all-purpose flour
- 1 cup unsalted butter, softened
- 1 cup granulated sugar
- 1 cup brown sugar, packed
- 2 large eggs
- 1 teaspoon vanilla extract
- 1 teaspoon baking soda
- 1/2 teaspoon salt
- 2 cups chocolate chips
- 1 cup chopped nuts (optional)
Instructions
- Preheat your oven to 350°F (175°C) and grease a 9×13 inch baking pan.
- Cream together the softened butter, granulated sugar, and brown sugar until smooth.
- Beat in the eggs one at a time, followed by the vanilla extract.
- In another bowl, combine the flour, baking soda, and salt. Gradually blend into the buttery mixture until just combined.
- Fold in the chocolate chips and nuts, if using.
- Spread the batter evenly into the prepared pan.
- Bake for 20 to 25 minutes until the edges are golden brown.
- Allow to cool completely before cutting into squares.
- For best results, store bars in the freezer for about 10 minutes before serving.
Notes
For a gluten-free version, substitute with gluten-free flour. You can also use coconut oil in place of butter for a healthier option.
- Prep Time: 15 minutes
- Cook Time: 25 minutes
- Category: Dessert
- Method: Baking
- Cuisine: American
- Diet: Vegetarian
Nutrition
- Serving Size: 1 bar
- Calories: 250
- Sugar: 18g
- Sodium: 200mg
- Fat: 12g
- Saturated Fat: 7g
- Unsaturated Fat: 5g
- Trans Fat: 0g
- Carbohydrates: 35g
- Fiber: 1g
- Protein: 3g
- Cholesterol: 30mg