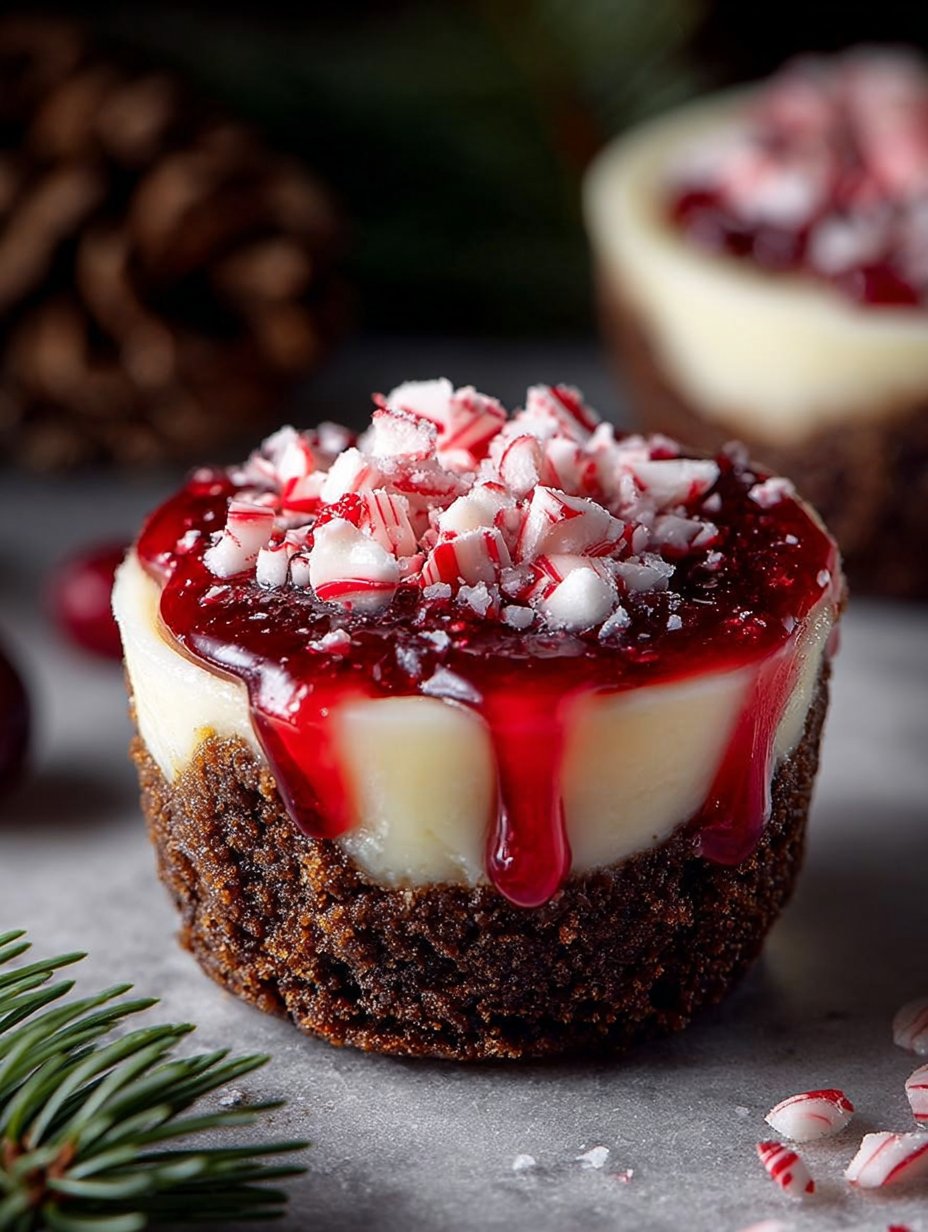
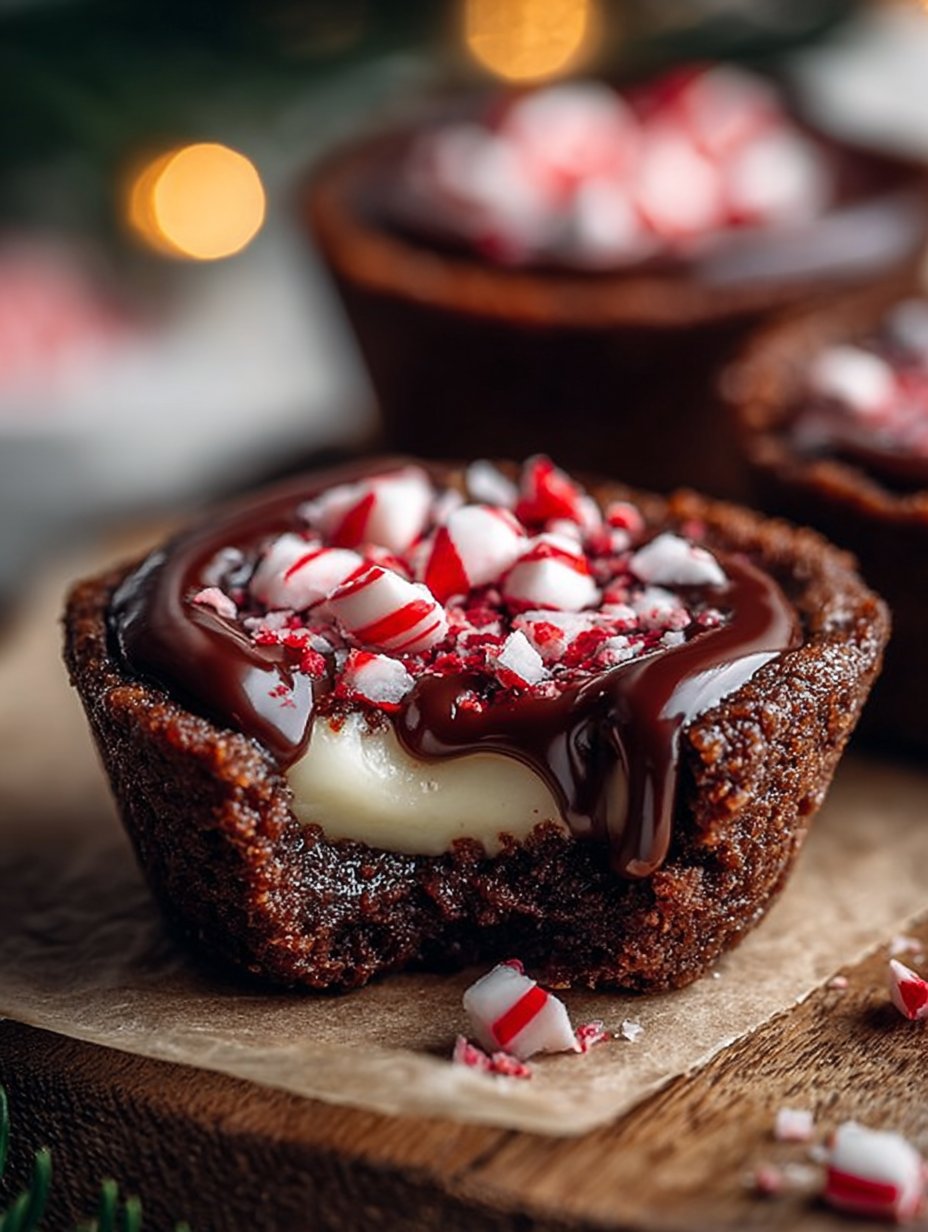
I love making Chocolate Peppermint Cookie Cups during the holiday season. They feature a crisp chocolate shell filled with a cool, silky peppermint cheesecake. The contrast between the textures is simply magical. With rich cocoa flavors balanced by a refreshing mint filling, these treat cups are a hit at my gatherings. They’re easy to whip up, and the vibrant red candy cane topping adds a festive flair. Let me show you how to create these delicious bites that are sure to impress your family and friends.
Pro Tips from Chef Rita
- Chill your mixing bowl and whisk to help the whipped cream reach stiff peaks quickly.
- Sift cocoa powder to avoid lumps and ensure the dough stays uniform.
- Press the cookie wells while they are still warm for the best shape.
- Refrigerate filled cookie cups for optimal texture and to develop flavors before serving.
Table of Contents
Chocolate Peppermint Cookie Cups Recipe begins with a crisp cocoa shell and finishes with a cool, silky peppermint cheesecake filling that brightens the palate.
The idea is simple: bake shallow cookie cups, press wells while warm, then fill with a whipped cream cheese mousse chilled until just set.
Serve them cold so the contrast between textured chocolate and smooth filling sings, and let the chopped candy cane add a brittle snap and peppermint perfume.
Why This Recipe Works
Chocolate Peppermint Cookie Cups Recipe pairs dense, deeply chocolate cookie walls with a feather-light peppermint filling, creating a balanced contrast of textures and temperatures.
The cookie dough is dark and almost fudgy from Dutch-processed and black cocoa powders, which crisp at the edges but stay tender inside.
Folding whipped cream into sweetened cream cheese yields a silky mousse that holds shape yet melts on the tongue.
A final sprinkle of crushed candy cane cuts the richness and leaves a cool, minty finish.
Flavor and Texture
The first bite offers a brittle edge that gives way to a soft, chocolate center, a texture journey that feels deliberate and refined.
Cocoa notes are rounded by brown sugar caramel undercurrents and a whisper of vanilla, while black cocoa deepens color and provides an almost espresso-like intensity.
The peppermint filling is airy and satin-smooth, its coldness amplifying the cookie’s warmth for a lively temperature contrast.
Visually, the dark cups and white swirls create a modern dessert silhouette, punctuated by vivid red flecks of crushed candy cane.
Convenience and Time
These cookie cups are manageable on a weeknight but elegant enough for company, with clear hands-on steps and predictable timing.
Make the dough, scoop into muffin tins, bake, press wells while still warm, then cool and fill the process is sequential and forgiving.
Chilling the filled cups for an hour sets the filling and lets flavors marry, so you can prep in stages around other tasks.
Diet Friendly Options
You can trim sugar modestly without losing structure, or swap light brown sugar for coconut sugar for a nuttier note while keeping color.
To reduce dairy, try a cultured vegan cream cheese and coconut cream whipped until stiff, though texture shifts subtly.
Keep the peppermint brightness intact with a natural peppermint extract and omit colored gels if you prefer a simpler presentation.
Ingredients
- 2 cups all-purpose flour
- 1/4 cup Dutch-processed cocoa powder (sifted)
- 1/4 cup black cocoa powder
- 1 tsp baking soda
- 1/2 tsp salt
- 1 cup unsalted butter (room temperature)
- 1/2 cup granulated sugar
- 1 cup light brown sugar (packed)
- 2 large eggs (room temperature)
- 1 tsp vanilla extract
- 1 cup heavy whipping cream (chilled)
- 8 oz cream cheese (full fat)
- 1/2 cup granulated sugar
- 1 tsp peppermint extract
- red color gel (for piping bag decoration)
- candy canes (chopped, for garnish)
Step by Step Instructions
- Preheat your oven to 350°F (175°C). Spray two regular-sized cupcake tins thoroughly with cooking spray to prevent sticking.
- In a medium bowl, whisk together the all-purpose flour, Dutch-processed cocoa powder, black cocoa powder, baking soda, and salt. Set this mixture aside for later use.
- In a large mixing bowl, beat the unsalted butter, granulated sugar, and light brown sugar on medium-high speed until the mixture is light, fluffy, and well combined, about 2 to 3 minutes.
- Reduce the mixer speed to low and add the eggs one at a time, followed by the vanilla extract. Beat until fully incorporated.
- Gradually add the flour mixture to the butter mixture and mix only until just combined, making sure not to overmix.
- Using a large cookie scoop or approximately 3 tablespoons, portion the cookie dough evenly into the prepared muffin tins.
- Bake the cookie cups for about 10 to 13 minutes or until they are mostly set but still soft in the centers.
- Immediately after removing from the oven, press down firmly into the center of each cookie cup using a small jar or container to create a well for the filling.
- Allow the cookie cups to cool in the pans for 10 minutes. Then gently twist each cup slightly to loosen them, continue cooling for an additional 5 minutes, and transfer them to a wire rack to cool completely.
- Using a cold bowl and whisk, whip the chilled heavy cream until stiff peaks form.
- In a separate mixing bowl, beat the full-fat cream cheese, granulated sugar, and peppermint extract together until the mixture is smooth and creamy.
- Gently fold the whipped cream into the cream cheese mixture until fully combined and smooth.
- Using a small food-safe paintbrush, paint two decorative red stripes on the inside of a piping bag fitted with a large round tip. Fill the piping bag carefully with the peppermint cheesecake filling.
- Pipe a generous swirl of the cheesecake filling into each cooled cookie cup.
- Refrigerate the filled cookie cups for about 1 to 2 hours or until the filling is set.
- Sprinkle chopped candy canes on top of the chilled cookie cups. Serve immediately or keep refrigerated and consume within 2 to 3 days. For longer storage, freeze without candy cane topping for up to 4 weeks.
Tips and Tricks for Success
Chill the bowl and whisk for the whipped cream so peaks form quickly and the filling stays light.
Sift the Dutch-processed cocoa powder to prevent lumps and to keep the dough uniform and dark.
Press the wells while the cookies are still warm; doing so later risks cracking the shells and losing their smooth rim.
When piping the filling, hold the bag perpendicular for a clean swirl that shows off the contrast between dark cookie and white mousse.
If you want a cleaner finish, chill the cups briefly before piping to reduce spreading.
Ingredient Swaps
For a slightly lighter cookie, swap half the butter for a neutral vegetable oil but expect a softer edge.
If you prefer less sweetness, reduce the filling sugar by one quarter and taste as you go to keep texture intact.
To avoid artificial colors, skip the red gel and finish with whole candy cane shards for a rustic look.
These substitutions preserve the core identity of Chocolate Peppermint Cookie Cups Recipe while adjusting sweetness, fat, or appearance.
Pairings and Serving Suggestions
Serve these cups chilled on a simple white plate so the colors pop and each portion reads as an individual dessert.
A small espresso or a mint tea complements the dark cocoa and cuts the cream’s richness without masking peppermint.
For a festive platter, alternate cookie cups with plain chocolate truffles for tonal contrast and varied mouthfeel.
Garnish any leftover tray with cocoa powder dusted around the edges to frame the presentation.
Storage and Make Ahead Tips
Bake the cookie shells up to two days ahead and store them airtight at room temperature to preserve the crisp edges.
Make the filling and keep it chilled in the refrigerator for up to 24 hours; fold whipped cream just before assembling for best texture.
Assemble filled cups and refrigerate until serving; they hold well for 1 to 2 days without losing shape.
For longer storage, freeze untrimmed, unfrosted cups up to four weeks and add crushed candy cane after thawing.
Nutrition and Health Benefits
This dessert is indulgent, delivering fat from butter and cream cheese and a concentrated dose of cocoa antioxidants.
Brown sugar provides moisture and a deeper flavor while keeping the cookie tender, though it increases the sugar load.
Light modifications, such as lower sugar or reduced-fat substitutes, will change texture, so balance adjustments thoughtfully.
For specific dietary needs, please consult a qualified health professional.
Mistakes to Avoid
Do not overmix once you add the flour; overworked dough yields tough cups rather than tender shells.
Avoid painting too much gel inside the bag; thick stripes can bleed into the filling and alter flavor.
Do not skip chilling the filling if you want clean, stable swirls and a satisfying mouthfeel.
Press wells immediately after baking; waiting cools the dough and makes shaping difficult.
Personal Closing Thought and Call to Action
This recipe rewards small attentions: sifting, gentle folding, and a steady hand when piping elevate the simple to the memorable.
If you liked the contrast here, try riffing with orange oil or espresso to explore new pairings that retain the structure of Chocolate Peppermint Cookie Cups Recipe.
Share your photos and adjustments to inspire others; precise technique yields consistent, beautiful results.
Conclusion
Chocolate Peppermint Cookie Cups Recipe is a study in contrasts crisp chocolate shells sheltering a cool, silky peppermint heart, ideal for seasonal gatherings or a restrained celebration.
For a variation and visual guide, see Chocolate Peppermint Cookie Cups Recipe.
FAQ
What is the preparation time for this recipe?
The preparation time usually takes about 15 to 20 minutes depending on experience and equipment.
Can I substitute any ingredients?
Yes, simple substitutions are possible depending on dietary needs or availability.
Is this recipe suitable for specific diets?
This recipe can be adapted with small changes depending on preferences.
How should leftovers be stored?
Store leftovers in an airtight container in the refrigerator and consume within two to three days.
Can I prepare this recipe in advance?
Many steps can be prepared ahead of time to simplify busy cooking days, and Chocolate Peppermint Cookie Cups Recipe components freeze well when stored separately.

Chocolate Peppermint Cookie Cups Recipe
Decadent chocolate cookie cups filled with a silky peppermint cheesecake filling and topped with crushed candy canes.
Total Time: 133 minutes
Yield: 24 servings 1x
Ingredients
Scale
- 2 cups all-purpose flour
- 1/4 cup Dutch-processed cocoa powder (sifted)
- 1/4 cup black cocoa powder
- 1 tsp baking soda
- 1/2 tsp salt
- 1 cup unsalted butter (room temperature)
- 1/2 cup granulated sugar
- 1 cup light brown sugar (packed)
- 2 large eggs (room temperature)
- 1 tsp vanilla extract
- 1 cup heavy whipping cream (chilled)
- 8 oz cream cheese (full fat)
- 1/2 cup granulated sugar
- 1 tsp peppermint extract
- red color gel (for piping bag decoration)
- candy canes (chopped, for garnish)
Instructions
- Preheat your oven to 350°F (175°C). Spray two regular-sized cupcake tins thoroughly with cooking spray to prevent sticking.
- In a medium bowl, whisk together the all-purpose flour, Dutch-processed cocoa powder, black cocoa powder, baking soda, and salt. Set this mixture aside.
- In a large mixing bowl, beat the unsalted butter, granulated sugar, and light brown sugar on medium-high speed until light and fluffy, about 2 to 3 minutes.
- Reduce the mixer speed to low and add the eggs one at a time, followed by the vanilla extract. Beat until fully incorporated.
- Gradually add the flour mixture to the butter mixture and mix until just combined.
- Using a large cookie scoop, portion the cookie dough into the prepared muffin tins.
- Bake for about 10 to 13 minutes or until mostly set but soft in the centers.
- Press down into the centers of each cookie cup using a small jar or container.
- Allow cooling in the pans for 10 minutes, then transfer to a wire rack to cool completely.
- Whip the chilled heavy cream until stiff peaks form in a cold bowl.
- In another bowl, beat the cream cheese, granulated sugar, and peppermint extract until smooth.
- Fold the whipped cream into the cream cheese mixture until combined.
- Pipe the cheesecake filling into each cooled cookie cup.
- Refrigerate for 1 to 2 hours until set, then sprinkle chopped candy canes on top before serving.
Notes
These cookie cups can be made ahead of time. Store baked cups in an airtight container at room temperature and fill them the day of serving for best results.
- Prep Time: 20 minutes
- Cook Time: 13 minutes
- Category: Dessert
- Method: Baking
- Cuisine: American
- Diet: Vegetarian
Nutrition
- Serving Size: 1 cookie cup
- Calories: 250
- Sugar: 15g
- Sodium: 150mg
- Fat: 18g
- Saturated Fat: 11g
- Unsaturated Fat: 4g
- Trans Fat: 0g
- Carbohydrates: 29g
- Fiber: 1g
- Protein: 3g
- Cholesterol: 40mg
Frequently Asked Questions
Can I use different types of cocoa powder?
Absolutely! Mixing Dutch-processed cocoa with black cocoa adds depth. Feel free to experiment with other types for varied taste.
How can I store leftover cookie cups?
Store them in an airtight container in the fridge for 2-3 days. They can also be frozen for up to four weeks without the candy cane topping.
Can I make these cookie cups ahead of time?
Yes, you can prepare the cookie cups in advance and fill them with the cheesecake mixture closer to serving for the best texture.
What can I substitute for dairy products?
You can use cultured vegan cream cheese and coconut whipped cream as alternatives to keep the recipe dairy-free.
How do I enhance the peppermint flavor?
Using high-quality peppermint extract can boost the refreshing flavor. Just be cautious with the quantity so it doesn’t overpower the dessert.
Final Thoughts
These Chocolate Peppermint Cookie Cups are perfect for your festive gatherings. Try pairing them with my Irresistible White Chocolate Peppermint Cookies or Delightful Chocolate Peppermint Bread for a wonderful holiday dessert spread. I can assure you, your guests will be delighted!