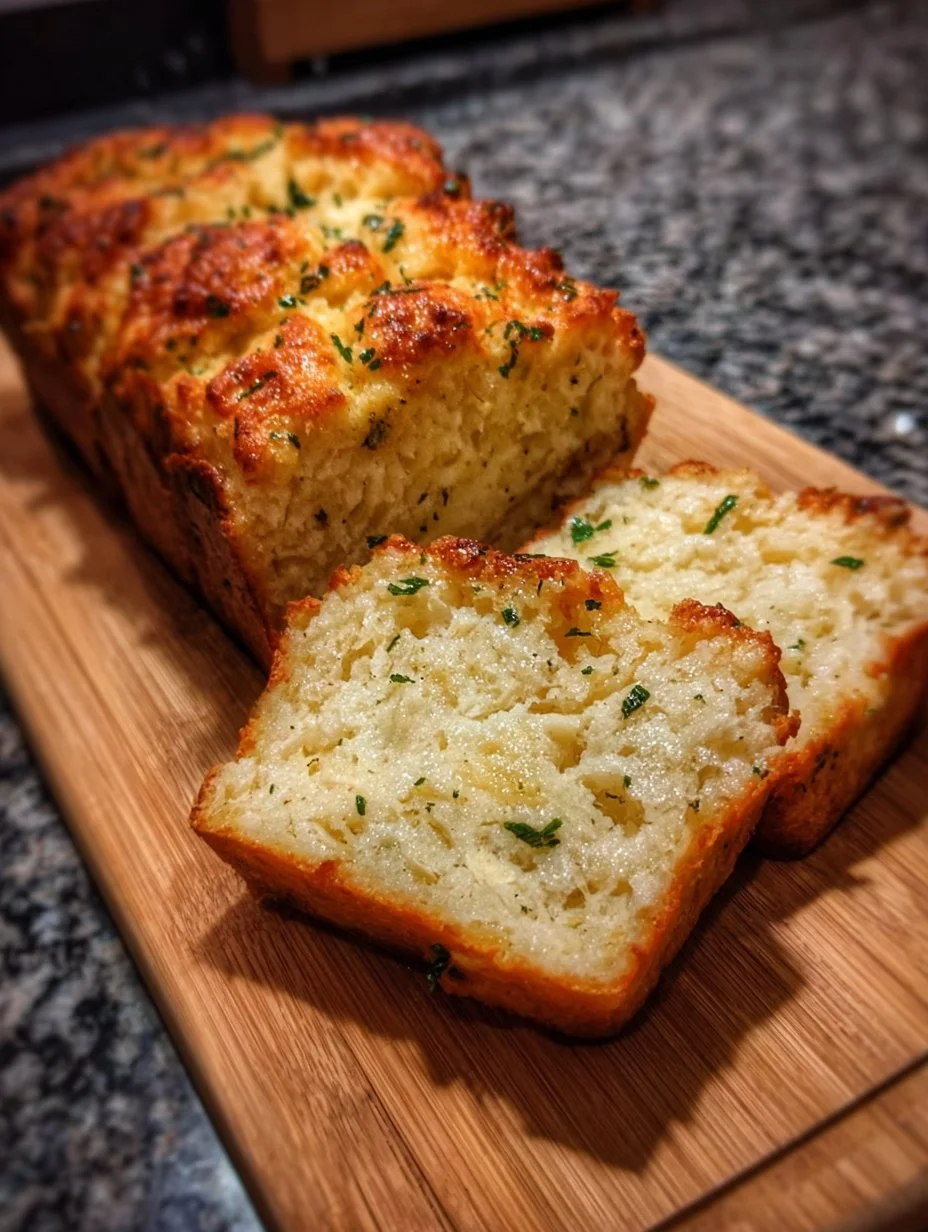
Gluten free potato bread transforms your kitchen with the most tender, fluffy loaf you’ll ever bake. I’m Chef Rita, and this recipe uses creamy mashed potatoes as the secret ingredient for incredible moisture and structure. The potatoes create a silky crumb that rivals any traditional wheat bread, while gluten free flour provides the perfect foundation. This wholesome loaf offers gentle sweetness and a golden crust that crackling softly when you slice it. The dough comes together quickly with minimal kneading, making it perfect for busy weeknights. Active dry yeast gives beautiful rise and airy texture, while olive oil keeps every bite tender. Whether you’re new to gluten free baking or seeking comfort food that accommodates dietary needs, this potato bread delivers exceptional results with simple pantry ingredients.
Pro Tips from Chef Rita
- Use room temperature mashed potatoes to ensure even mixing and prevent lumps in your dough
- Test yeast freshness by watching for vigorous bubbling within 5 minutes of proofing
- Let the baked loaf cool completely before slicing to preserve its fluffy internal structure
- Tent with foil if the top browns too quickly during the final 10 minutes of baking
Table of Contents
Introduction
Gluten Free Potato Bread sits at the crossroad of comfort and refinement, its crust offering a gentle crisp that gives way to a silky, moist crumb.
This loaf leans on mashed potatoes for humidity and a tender bite, a simple technique that transforms pantry staples into something quietly elegant.
For a contrasting bowl or an easy dinner, see how flavors pair with a warm, savory soup like Gluten Free Potato Bread inspired accompani ment.
Baking is calm here: minimal kneading, a short rest, a reliable oven finish that yields a golden top and an evenly baked interior.
Why This Recipe Works
Gluten Free Potato Bread relies on mashed potatoes to provide moisture and structure without gluten.
The potatoes act like a gentle binder, giving the crumb silkiness and spring that a plain gluten-free flour blend can lack.
Yeast and a touch of baking powder lift the loaf quickly, so you get oven spring and an airy mouthfeel without long fermentation.
Olive oil rounds the flavor and keeps the crust tender rather than brittle.
Flavor and Texture
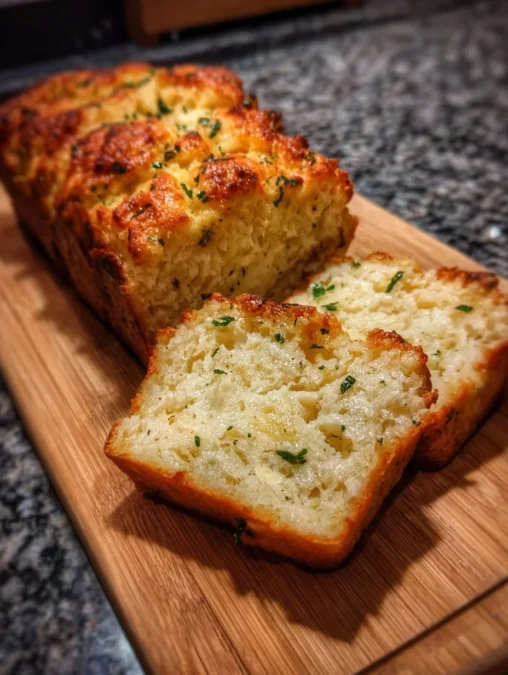
The first bite should present a thin, tawny crust that offers a subtle crackle under your fingers.
Inside, the crumb is dense but soft, the mashed potatoes lending a creamy streak that interrupts the grain of the gluten-free flour.
A whisper of olive oil brightens the palate and keeps the texture from drying out as it cools.
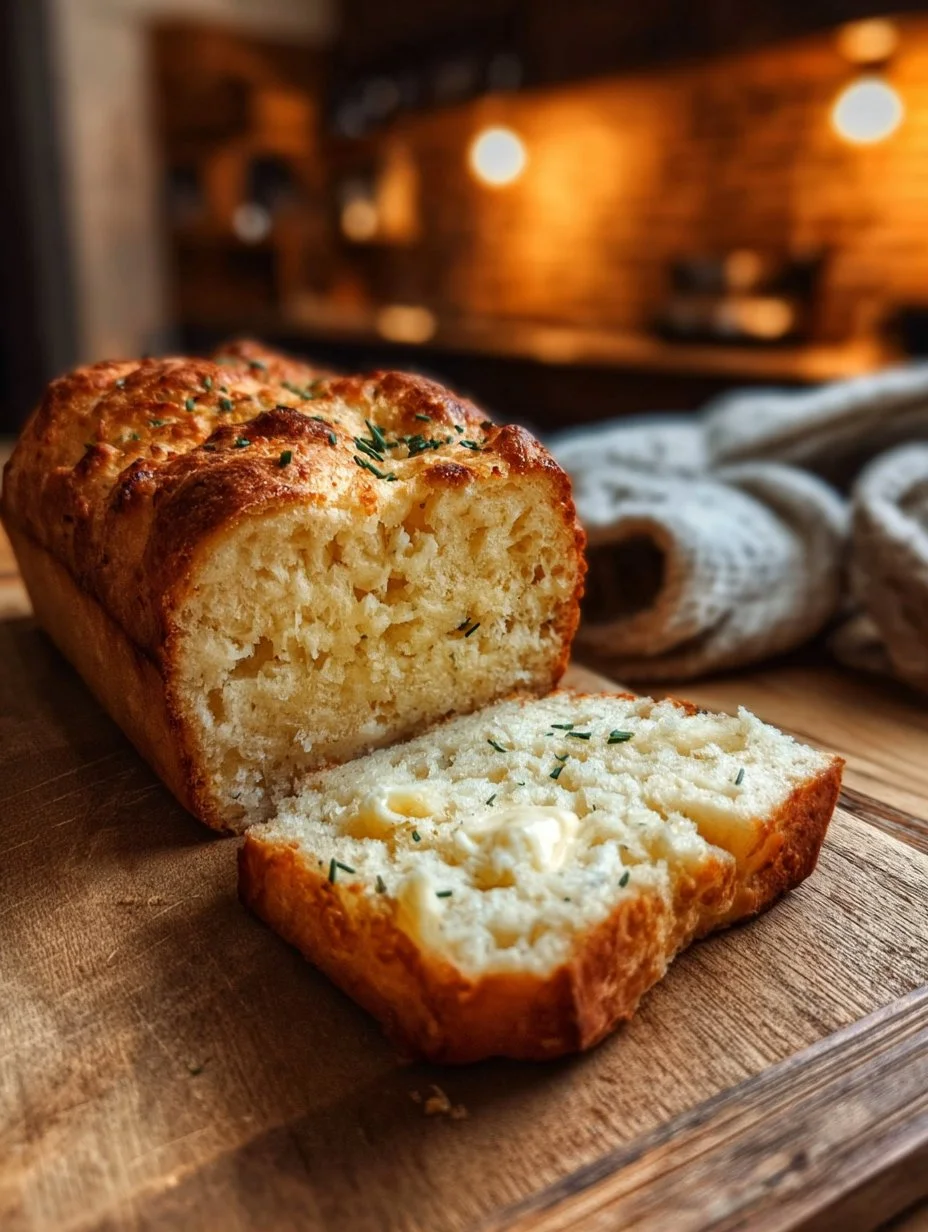
Warm from the oven, the loaf smells faintly of bread dough and roasted potato; the aroma deepens as it cools.
Serve slightly toasted to introduce a crisp edge that contrasts with the loaf’s silky center.
Sprinkle flaky salt on a warm slice and the contrast between crunchy crystals and soft crumb becomes quietly sumptuous.
A scatter of fresh herbs or a smear of cultured butter is all the loaf needs to feel complete.
Convenience and Time
This recipe asks for familiar, quick steps: mash, mix, rest, shape, bake.
Active hands-on time is short; much of the process is a gentle pause while the dough relaxes.
The dough does not require lengthy kneading, making it friendly for novice bakers or weeknight schedules.
Total oven time is moderate, leaving room to prepare a simple salad or soup while the loaf finishes.
Cooling matters: give the loaf time to set so slicing doesn’t compress the soft crumb.
A day of planning can yield fresh bread for several meals without fuss.
Diet Friendly Options
This loaf is naturally free of wheat and gluten when you select a certified gluten-free flour blend.
To keep the profile vegan, use mashed potatoes made with olive oil rather than butter or milk.
Reduce oil slightly for lower fat, or swap in a neutral-tasting oil if you prefer.
For a nut-free version, ensure your flour blend does not include almond or other nut flours.
Salt and sugar are minimal, so the basic recipe suits many diets with only small tweaks to taste.
If you need precise nutrition, tailor portion sizes and consult a specialist for exact guidance.
Ingredients
- 2 cups mashed potatoes
- 1 1/2 cups gluten-free all-purpose flour
- 1/2 cup warm water
- 2 tablespoons olive oil
- 1 tablespoon sugar
- 1 teaspoon salt
- 2 teaspoons active dry yeast
- 1/2 teaspoon baking powder
Step by Step Instructions
- In a small bowl, combine warm water, sugar, and yeast. Let it sit for about 5 minutes until frothy.
- In a mixing bowl, combine the mashed potatoes, gluten-free flour, salt, and baking powder.
- Add the yeast mixture and olive oil to the dry ingredients. Mix until it forms a dough.
- Let the dough rest for 30 minutes in a warm place.
- Preheat the oven to 375°F (190°C).
- Shape the dough into a loaf and place it in a greased loaf pan.
- Bake for 30-35 minutes or until golden brown and a toothpick comes out clean.
- Allow to cool before slicing.
Tips and Tricks for Success
Measure flour by spooning it into the cup rather than scooping to avoid a dry, heavy loaf.
Warm the water but do not exceed body temperature; too-hot liquid will kill the yeast.
Use room-temperature mashed potatoes for a uniform dough and predictable mixing.
A light oiling of the loaf pan will encourage an even crust release without a greasy bottom.
If your kitchen is cool, place the dough near a warm oven or on top of a slightly warm appliance to encourage the rise.
Allow the loaf to cool fully before slicing to preserve its internal steam and structure.
If the top browns too quickly, tent with foil for the final minutes of baking.
Ingredient Swaps
Swap olive oil for a neutral oil if you want a plainer flavor that lets the potato note shine.
Use instant mashed potato flakes hydrated with water for a time-saving shortcut, but reduce added water accordingly.
Try a blend of brown rice and tapioca-based gluten-free flours if your all-purpose mix is unavailable.
For extra lift, a small yolk can be whisked in, though this shifts the recipe toward richer fare.
To introduce color and savory depth, fold in roasted garlic or finely chopped chives before the final rest.
Be mindful: changes to hydration or fat content will alter texture, so adjust resting time and feel rather than strict volumes.
Pairings and Serving Suggestions
Serve warm slices with cultured butter and a sprinkle of flaky sea salt for a classic approach.
A smear of ricotta and lemon zest enhances the bread’s silky, neutral profile for a bright breakfast.
Pair with roasted vegetables and a herb-forward dipping oil to showcase textural contrasts, or accompany a boldly seasoned soup.
To build a simple evening plate, add thinly sliced cheese and a crisp green salad for balance.
Toast thick slices for an open-faced sandwich topped with roasted mushrooms and fresh thyme.
For a breakfast board, include honey, jam, and slices of this loaf for a soft, elegant starch.
Storage and Make Ahead Tips
Wrap cooled slices tightly to prevent drying and store at room temperature for up to two days.
For longer storage, freeze slices in a sealed bag; refresh in a toaster or oven straight from frozen.
Make the dough the night before and refrigerate for a slow, cold-proofed rise; allow it to come to room temperature before baking.
Reheat gently to restore the loaf’s silky interior without over-crisping the crust.
Avoid storing near strong-smelling foods; the soft crumb absorbs aromas more readily than heartier breads.
Label and date frozen portions to maintain freshness and rotation.
Nutrition and Health Benefits
Mashed potatoes add resistant starch and provide a moist crumb without extra dairy or eggs.
Using olive oil introduces heart-healthy monounsaturated fats and keeps the loaf tender.
A gluten-free all-purpose blend can be chosen to control calorie density and fiber content, depending on brand.
Lower-sodium adaptations are simple: reduce the salt slightly and rely on finishing salt for flavor.
For specific dietary needs, please consult a qualified health professional.
This bread offers a satisfying, lower-effort way to enjoy a tender loaf while accommodating gluten-free needs.
Mistakes to Avoid
Don’t skip proofing the yeast; an inactive yeast batch will leave the dough flat and dense.
Avoid adding too much flour when shaping; the dough should be slightly tacky to hold moisture.
Do not slice the loaf while it is still steaming hot, or the crumb will compress and become gummy.
Resist the urge to overbake watch for a warm, golden tone rather than a deep brown.
Be cautious with substitutions that dramatically change hydration; they often require adjustments in technique.
If the top darkens too fast, tent it rather than increasing the oven temperature, which risks drying the crumb.
Personal Closing Thought and Call to Action
This loaf delivers quiet luxury: simple ingredients, thoughtful technique, and a texture that feels intentional.
Bake a small loaf, take the time to taste it warm, and notice how the potato lends a soft, sustaining quality.
If you enjoy this approach to gluten-free baking, explore other comforting, pantry-led recipes and share your results.
Tag a friend or save this recipe to revisit when you want something reliably tender and elegant.
Conclusion
Gluten Free Potato Bread is proof that minimal technique and a clever ingredient can produce a loaf with true presence.
For a variation rooted in regional tradition and to compare textures, see this take on Irish potato flatbreads at Gluten Free Potato Bread.
FAQ
What is the preparation time for this recipe?
The preparation time usually takes about 15 to 20 minutes depending on experience and equipment.
Can I substitute any ingredients?
Yes, simple substitutions are possible depending on dietary needs or availability; you can swap oils, adjust flour blends, or use instant mashed potato flakes to speed the process, including for Gluten Free Potato Bread.
Is this recipe suitable for specific diets?
This recipe can be adapted with small changes depending on preferences.
How should leftovers be stored?
Store leftovers in an airtight container in the refrigerator and consume within two to three days.
Can I prepare this recipe in advance?
Many steps can be prepared ahead of time to simplify busy cooking days.
Gluten Free Potato Bread
A comforting and refined gluten-free bread made with mashed potatoes for moisture and softness, featuring a crispy crust and silky interior.
Total Time: 55 minutes
Yield: 1 loaf 1x
Ingredients
Scale
- 2 cups mashed potatoes
- 1 1/2 cups gluten-free all-purpose flour
- 1/2 cup warm water
- 2 tablespoons olive oil
- 1 tablespoon sugar
- 1 teaspoon salt
- 2 teaspoons active dry yeast
- 1/2 teaspoon baking powder
Instructions
- In a small bowl, combine warm water, sugar, and yeast. Let it sit for about 5 minutes until frothy.
- In a mixing bowl, combine the mashed potatoes, gluten-free flour, salt, and baking powder.
- Add the yeast mixture and olive oil to the dry ingredients. Mix until it forms a dough.
- Let the dough rest for 30 minutes in a warm place.
- Preheat the oven to 375°F (190°C).
- Shape the dough into a loaf and place it in a greased loaf pan.
- Bake for 30-35 minutes or until golden brown and a toothpick comes out clean.
- Allow to cool before slicing.
Notes
For best results, let the loaf cool fully before slicing to preserve its internal steam and structure. Serve with a sprinkle of flaky salt or cultured butter.
- Prep Time: 20 minutes
- Cook Time: 35 minutes
- Category: Bread
- Method: Baking
- Cuisine: Gluten Free
- Diet: Gluten-Free, Vegan (if using olive oil), Vegetarian
Nutrition
- Serving Size: 1 slice
- Calories: 180
- Sugar: 1g
- Sodium: 300mg
- Fat: 6g
- Saturated Fat: 1g
- Unsaturated Fat: 4g
- Trans Fat: 0g
- Carbohydrates: 30g
- Fiber: 3g
- Protein: 4g
- Cholesterol: 0mg
Frequently Asked Questions
Can I use instant mashed potatoes for this bread?
Yes, you can substitute instant mashed potato flakes. Use about 1/2 cup flakes mixed with warm water to equal 2 cups prepared mashed potatoes. Reduce the additional water in the recipe accordingly to maintain proper dough consistency.
How long does gluten free potato bread stay fresh?
Store wrapped at room temperature for up to 2 days, or freeze slices for up to 3 months. The mashed potatoes help retain moisture longer than typical gluten free breads. Toast frozen slices directly without thawing.
Why is my potato bread dense instead of fluffy?
Dense texture usually indicates inactive yeast or over-mixed dough. Always proof your yeast until foamy, and mix just until ingredients combine. Ensure mashed potatoes are room temperature to avoid shocking the yeast with temperature changes.
Can I make this bread dairy-free?
Absolutely! This recipe is naturally dairy-free when you make mashed potatoes with olive oil instead of butter or milk. Use plant-based milk if needed for the potatoes, and the bread will remain completely dairy-free.
What’s the best gluten free flour for potato bread?
Use a certified gluten-free all-purpose flour blend containing rice flour, tapioca starch, and potato starch. Avoid single-ingredient flours as they won’t provide the structure needed for proper rise and texture in yeast breads.
Final Thoughts
This gluten free potato bread proves that dietary restrictions never mean sacrificing flavor or texture. The mashed potatoes create incredible softness that keeps for days. Try pairing warm slices with our Gluten-Free Chocolate Mousse Cake for a complete comfort meal, or serve alongside Crock Pot Thai Ginger Chicken Soup for cozy dinners. Happy baking from my kitchen to yours!