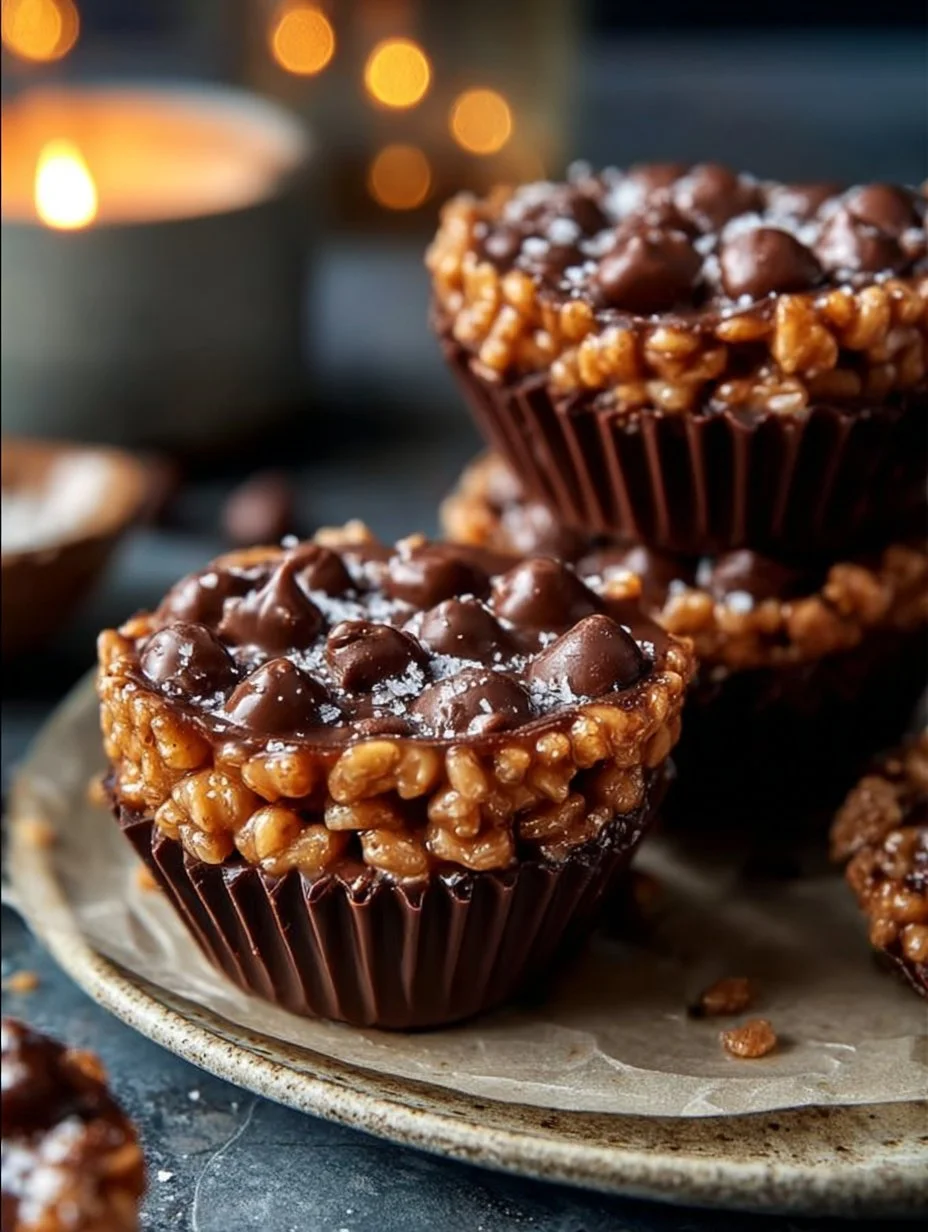
I love making chocolate peanut butter rice krispie cups when I want an elegant no-bake dessert that comes together fast. These treats deliver a satisfying contrast between crispy cereal, creamy peanut butter filling, and a glossy chocolate coating. The magic happens on low heat, where butter, marshmallows, and peanut butter meld into a satiny binder that clings to each grain without crushing it. No special equipment needed, just a saucepan and muffin tin. Chef Rita recommends serving these slightly chilled so the chocolate fractures crisply while the interior stays soft and yielding. Whether you’re hosting guests or satisfying a sudden sweet craving, this no-bake method takes about 30 minutes from start to finish and works reliably every time.
Pro Tips from Chef Rita
- Heat your butter and marshmallows on low and stir constantly. High heat scalds the marshmallow and creates a grainy, broken texture instead of smooth silk.
- Press the cereal mixture gently but firmly into liners to preserve those air pockets that give you that satisfying crunch without crushing the structure.
- Apply only a thin chocolate layer over each cup. Thick pools cool unevenly and can mute the filling’s delicate texture and flavor balance.
- Let cups cool at room temperature for 20 minutes before refrigerating. This prevents condensation from forming on the chocolate top.
Table of Contents
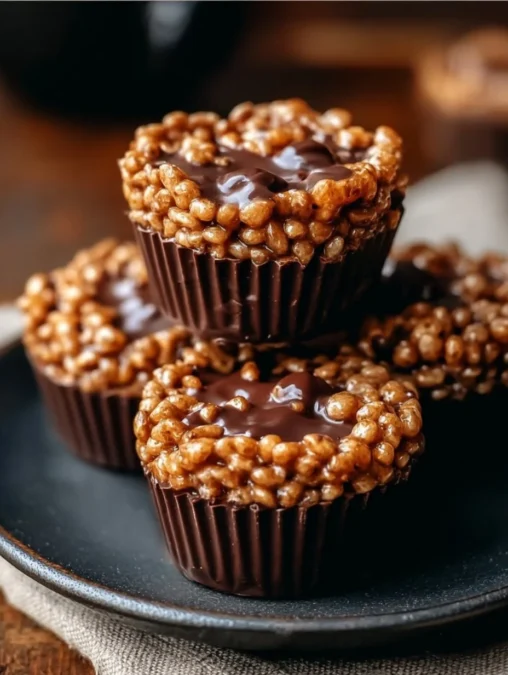
Chocolate Peanut Butter Rice Krispie Cups arrive as a small, elegant dessert that balances crunch and cream with the ease of a weeknight finish. The contrast between toasted cereal and glossy chocolate creates a moment of pure textural pleasure on the tongue.
These cups come together in thirty minutes and require no special equipment, which makes them both refined and practical. For a complementary twist, try them alongside Chocolate Peanut Butter Rice Krispie Cups inspired cookies that echo the same peanut richness.

Why This Recipe Works
Chocolate Peanut Butter Rice Krispie Cups depend on one reliable technique: gentle heat to marry butter, marshmallow and peanut butter into a satiny binder that clings to each crisp grain. That single, careful move preserves the cereal’s snap while building creamy body.
A light press into cups compacts the cereal without crushing the structure, and a thin chocolate cap adds temperature contrast and a visual gloss that reads as modern and restrained. Salted finishing crystals lift the flavors and sharpen the finish.
Flavor and Texture
Crunch and silk play across the same bite: the cereal snaps, then the peanut butter melts into warm marshmallow, coating the mouth with a mellow, nutty sweetness. The chocolate top cools quickly and offers a brittle counterpoint.
A whisper of vanilla in the binder brightens peanut notes while a pinch of sea salt elsewhere will make the chocolate taste richer. Serve slightly chilled so the chocolate fractures crisply but the interior remains soft and yielding.
Convenience and Time
Make a batch in under an hour; active time is mostly stirring and filling liners. The stovetop phase is patient and forgiving, requiring only low heat and a steady spoon, so the recipe suits casual cooks and serious hosts alike.
Left to set at room temperature, the cups firm gently; refrigeration shortens the wait if you prefer a snapier chocolate top. They travel well in a shallow tin layered with parchment.
Diet Friendly Options
Swap in sunflower seed butter to avoid tree nuts while keeping a silky mouthfeel; the color and aroma shift slightly but the structure holds. For dairy-free, use a plant-based butter and dairy-free chocolate to maintain the two-layer contrast without losing texture.
Reduce sugar by choosing dark chocolate for the cap, which adds bitter depth and a thinner coating. Small adjustments preserve the dessert’s visual identity while accommodating dietary preferences.
Ingredients
- 3 cups Rice Krispies cereal
- 1 cup creamy peanut butter
- 1/2 cup unsalted butter
- 1 cup mini marshmallows
- 1 cup chocolate chips
- 1/2 tsp vanilla extract (optional)
- Pinch of sea salt (optional)
Step by Step Instructions
- Melt the Base: In a medium saucepan over low heat, melt butter and marshmallows while stirring consistently until smooth.
- Add Peanut Butter: Stir in peanut butter and vanilla extract (if using) until fully combined and creamy.
- Mix with Cereal: Pour the Rice Krispies into a large bowl and add the peanut butter mixture. Gently fold until all the cereal is coated evenly.
- Shape the Cups: Line a muffin tin with paper liners. Spoon the mixture evenly into each cup and press down gently to form a flat surface.
- Add Chocolate Layer: Melt chocolate chips in the microwave (20-second intervals, stirring in between). Spoon melted chocolate over each cup and spread evenly. Sprinkle with sea salt if desired.
- Set & Serve: Allow the cups to cool at room temperature for 20 minutes or place them in the refrigerator to set faster. Once firm, remove the paper liners and serve!
Tips and Tricks for Success
Heat slowly and keep the pan on low; scalded marshmallow becomes grainy and ruins the silk you want. Stir steadily with a heatproof spatula so the butter and marshmallows emulsify into a uniform binder.
Press the mixture firmly but not aggressively into liners to preserve crisp air pockets for that pleasing snap. When glazing, a thin layer of chocolate works best: thick pools can mute the filling’s texture and cool unevenly.
Ingredient Swaps
For a nut-free option, sunflower seed butter provides similar fat and cream without altering the cereal’s structure. Swap mini marshmallows for equal volume of chopped regular marshmallows if needed; chop to encourage faster melting.
Use chopped dark chocolate instead of chips for a smoother melt and slightly drier set on top, which emphasizes the contrast between crisp and creamy without changing appearance dramatically.
Pairings and Serving Suggestions
These cups pair well with a bright, citrus tea that cuts the peanut richness and cleanses the palate between bites. For an indulgent route, a small scoop of vanilla ice cream contrasts temperature and adds milky balance.
Serve alongside peanut butter cowboy cookies for a textured dessert tray where chewy and crunchy elements echo one another. Present on a matte ceramic plate to highlight the glossy tops.
Storage and Make Ahead Tips
Store finished cups in an airtight container in the refrigerator for up to three days to maintain snap and firmness. For longer storage, freeze flat in a single layer, then stack with parchment and return to the freezer.
To refresh slightly softened chocolate, rest cups at room temperature for ten minutes before serving so the flavors reopen and the cap regains a hint of brittle texture.
Nutrition and Health Benefits
These treats deliver quick energy from carbohydrates, paired with the satiety of peanut butter’s healthy fats and protein. Using natural peanut butter increases unsaturated fats and reduces unnecessary additives.
Choosing darker chocolate raises antioxidant content and lowers sugar per bite, which can be a modest nutritional upgrade while keeping the dessert’s essential character. For specific dietary needs, please consult a qualified health professional.
Mistakes to Avoid
Avoid overheating the marshmallow mixture; an impatient boil will change texture and make the binder gluey. Equally, under-pressing the cereal leaves loose pockets that crumble when served, sacrificing that tidy cup silhouette.
Do not pour very hot chocolate directly onto the warm filling; let the cups cool slightly first so the chocolate sets cleanly. Keep the salt optional, and add it sparingly to avoid masking the peanut tone.
Personal Closing Thought and Call to Action
Chocolate Peanut Butter Rice Krispie Cups feel like a modern retro revival small, confident desserts that respect technique and texture. If you enjoy the interplay of crisp cereal and smooth chocolate, these cups make a refined and uncomplicated signature treat.
Try one warm from the fridge and one at room temperature to experience how temperature shifts the tactile pleasure, then share your favorite variation on social.
Conclusion
Chocolate Peanut Butter Rice Krispie Cups are a simple, high-impact dessert to keep in rotation when you want something elegant without fuss, and this method ensures consistent texture and glossy presentation. For inspiration and visual cues, the linked recipe offers another take that complements this technique.
FAQ
What is the preparation time for this recipe?
The preparation time usually takes about 15 to 20 minutes depending on experience and equipment.
Can I substitute any ingredients?
Yes, simple substitutions are possible depending on dietary needs or availability. For instance, sunflower seed butter can replace peanut butter while preserving texture and structure in Chocolate Peanut Butter Rice Krispie Cups.
Is this recipe suitable for specific diets?
This recipe can be adapted with small changes depending on preferences, such as dairy-free butter and vegan chocolate for a plant-based version.
How should leftovers be stored?
Store leftovers in an airtight container in the refrigerator and consume within two to three days.
Can I prepare this recipe in advance?
Many steps can be prepared ahead of time to simplify busy cooking days; fill and chill the cups, then glaze with chocolate just before serving for the best texture.
Chocolate Peanut Butter Rice Krispie Cups
Delicious small desserts that combine the crunch of Rice Krispies with a creamy peanut butter and chocolate topping.
Total Time: 45 minutes
Yield: 12 servings 1x
Ingredients
Scale
- 3 cups Rice Krispies cereal
- 1 cup creamy peanut butter
- 1/2 cup unsalted butter
- 1 cup mini marshmallows
- 1 cup chocolate chips
- 1/2 tsp vanilla extract (optional)
- Pinch of sea salt (optional)
Instructions
- Melt the Base: In a medium saucepan over low heat, melt butter and marshmallows while stirring consistently until smooth.
- Add Peanut Butter: Stir in peanut butter and vanilla extract (if using) until fully combined and creamy.
- Mix with Cereal: Pour the Rice Krispies into a large bowl and add the peanut butter mixture. Gently fold until all the cereal is coated evenly.
- Shape the Cups: Line a muffin tin with paper liners. Spoon the mixture evenly into each cup and press down gently to form a flat surface.
- Add Chocolate Layer: Melt chocolate chips in the microwave (20-second intervals, stirring in between). Spoon melted chocolate over each cup and spread evenly. Sprinkle with sea salt if desired.
- Set & Serve: Allow the cups to cool at room temperature for 20 minutes or place them in the refrigerator to set faster. Once firm, remove the paper liners and serve!
Notes
Store finished cups in an airtight container in the refrigerator for up to three days. For longer storage, freeze flat in a single layer, then stack with parchment and return to the freezer.
- Prep Time: 15 minutes
- Cook Time: 30 minutes
- Category: Dessert
- Method: No-Bake
- Cuisine: American
- Diet: Vegetarian
Nutrition
- Serving Size: 1 cup
- Calories: 200
- Sugar: 15g
- Sodium: 150mg
- Fat: 10g
- Saturated Fat: 3g
- Unsaturated Fat: 6g
- Trans Fat: 0g
- Carbohydrates: 24g
- Fiber: 1g
- Protein: 4g
- Cholesterol: 15mg
Frequently Asked Questions
How long do chocolate peanut butter rice krispie cups take to make?
Active preparation takes about 15 to 20 minutes depending on your experience. Setting time is roughly 20 minutes at room temperature or 10 minutes in the refrigerator. Total time from start to serving is approximately 30 to 40 minutes, making this an ideal last-minute dessert option.
Can I make chocolate peanut butter rice krispie cups ahead of time?
Yes, these cups store beautifully in an airtight container in the refrigerator for up to three days. For longer storage, freeze them flat in a single layer on a baking sheet, then stack with parchment and return to the freezer for up to two weeks. Let them come to room temperature before serving.
What are good substitutes for peanut butter in this recipe?
Sunflower seed butter works perfectly and creates a nearly identical texture and flavor profile. Almond butter also works well, though it’s slightly denser. For a dairy-free version, use coconut butter mixed with a pinch of salt to mimic the savory depth of peanut butter while maintaining the creamy consistency.
Why does my chocolate coating crack or look dull?
Cracks usually indicate the chocolate was too hot when applied or the filling was still warm underneath. Allow your cups to cool completely at room temperature first. For a dull finish, ensure you’re using quality chocolate chips and melting them gently. Tempering isn’t necessary for this recipe, but slow, even melting prevents blooming.
Can I make this recipe dairy-free or vegan?
Absolutely. Substitute plant-based butter for regular butter and use dairy-free chocolate chips. Marshmallows are typically vegan, but double-check your brand. The texture and structure remain consistent with these swaps, making it perfect for accommodating dietary preferences without sacrificing quality.
Final Thoughts
Chocolate peanut butter rice krispie cups are my go-to when I need an impressive dessert without fuss or baking. The combination of textures and flavors keeps guests coming back for seconds. Try pairing these with Salted Honey Pistachio Cookies for a textured dessert tray that showcases different techniques. For another elegant no-bake option, explore the Gluten-Free Chocolate Mousse Cake, which brings similar sophistication to your dessert rotation with minimal effort.