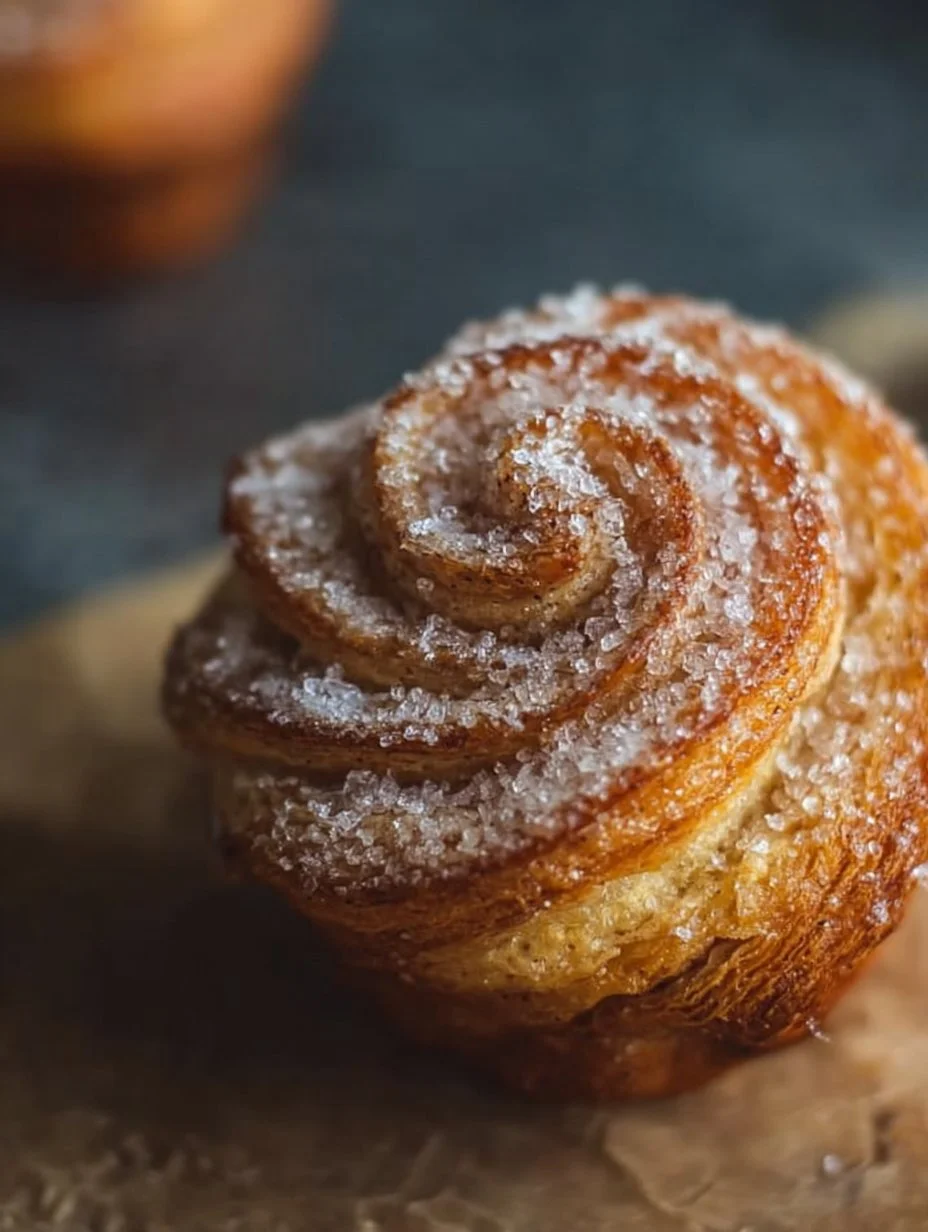
I’m Chef Rita, and I’ve perfected gluten free cruffins that marry a flaky, butter-bright exterior with a tender, custard-soft interior. These laminated pastries deliver the contrast and sophistication of traditional French pastry without gluten restrictions. The technique uses controlled folding and chilling to build distinct, crispy layers that stay separate during baking. A blend of starch and protein-rich gluten-free flours provides structure while remaining forgiving during rolling. Warm from the oven, the interior reads plush and buttery; cooled, the spiral tightens and firms beautifully. I’ve adapted this recipe specifically for home bakers who want impressive results without professional equipment. The method balances hydration and resting time, avoiding gummy centers. This is modern, measured pastry baking that rewards patience with nuanced flavor and refined texture.
Pro Tips from Chef Rita
- Keep butter and dough thoroughly chilled between folds to preserve distinct layers and prevent butter from smearing into the dough.
- Measure gluten-free flours by weight if possible, since these flours vary in density and water absorption far more than wheat flour.
- Brush dough sparingly with melted butter before rolling to encourage layer separation without saturation or greasiness.
- Avoid overly warm proofing spots during the final rise, as temperature fluctuations cause collapse and uneven baking.
Table of Contents
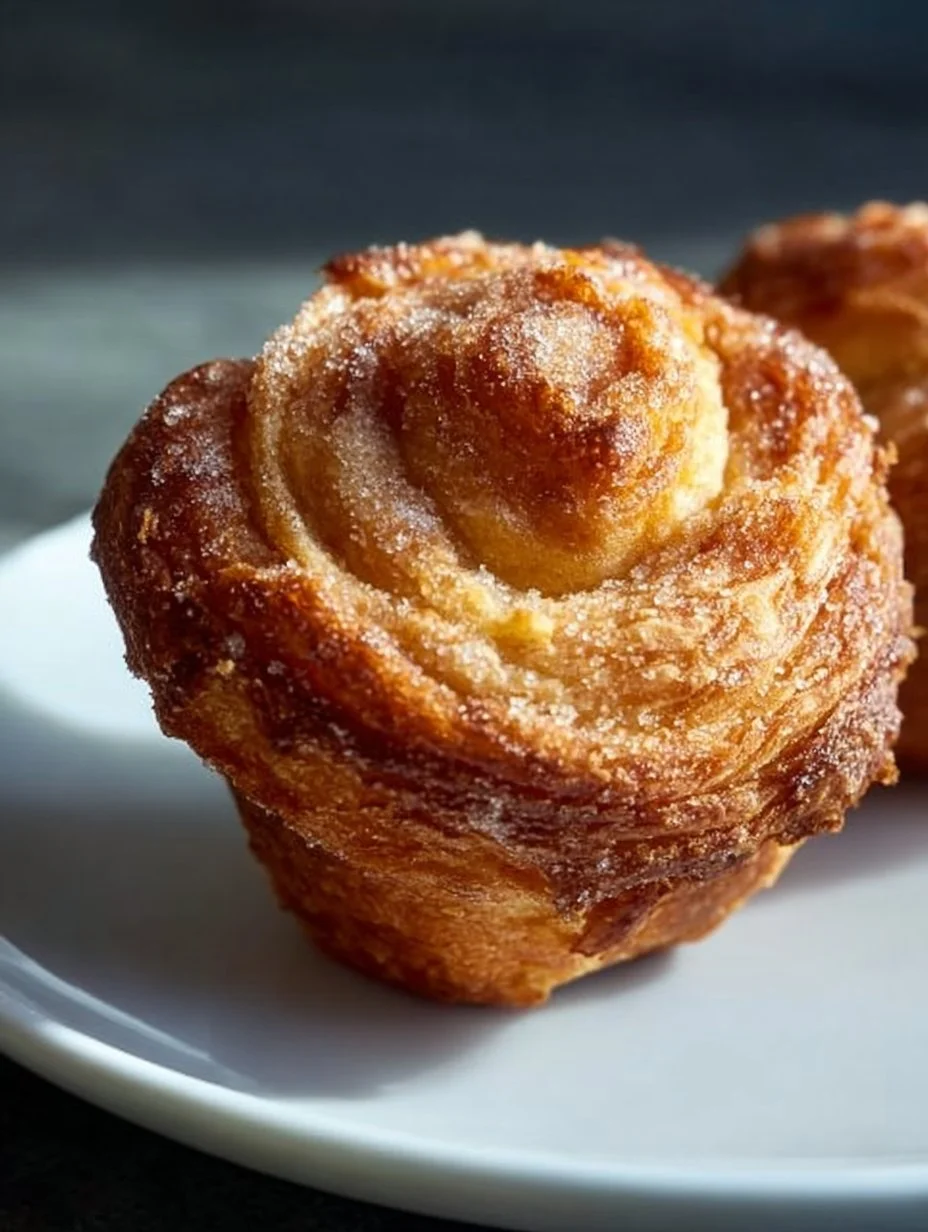
Decadent Gluten Free Cruffins marry a flaky, butter-bright exterior with a tender, custard-soft interior, a contrast that reads like pastry theatre on the plate. The technique is a simplified lamination adapted for gluten-free flours and reliable structure. The result feels modern and measured: crisp shards, silky crumb, a glossy spiral. For a different gluten-free pastry idea, see Decadent Gluten Free Cruffins that borrow gentle hydration tricks from other doughs.
Why This Recipe Works
Decadent Gluten Free Cruffins use controlled lamination to build distinct layers without traditional gluten strength. A blend of starch and protein-rich gluten-free flours gives the dough body while being forgiving during rolling. Butter is folded in chilled sheets, producing crisp, separated layers that brown evenly. The method balances hydration and resting time, avoiding gummy interiors.
Flavor and Texture
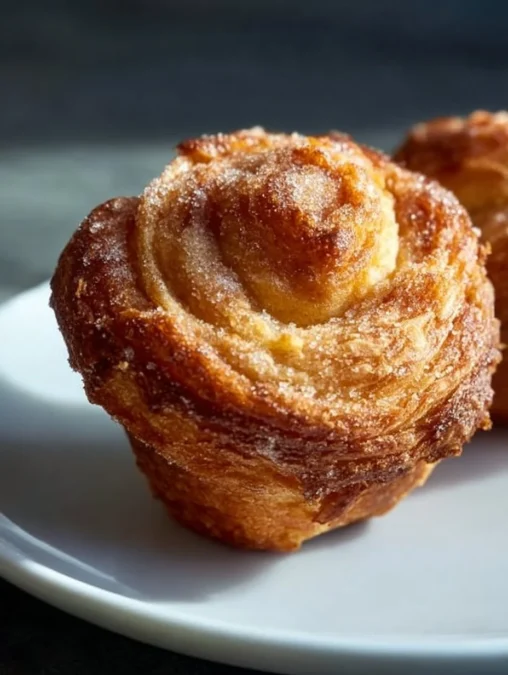
The first bite should offer a thin, audible crunch at the edge, followed by a soft, almost creamy crumb that yields beneath the tongue. A light caramelization brings toffee notes; bright lemon or citrus zest cuts through the richness. Warm from the oven, the interior reads plush and buttery; cooled, the spiral tightens and the texture firms. Visual contrast matters: a glossy, amber surface set against matte inner layers invites tasting.
Convenience and Time
This recipe is approachable for an attentive home baker; most hands-on time sits in mixing and laminating, with pauses for chilling. Timed rests let work be broken into morning and afternoon shifts, useful for busy schedules. Dough can be made a day ahead and chilled, shortening the final shaping stage. If you need a quicker bake, reduce folds and accept a slightly denser lamination.
Diet Friendly Options
The dough works with certified gluten-free blends; choose flours with rice, tapioca, and sorghum for balanced texture. Use a high-quality, dairy-free butter alternative if avoiding dairy, but chill it well so laminating still works. Reduce sugar in the dough and rely on a light dusting or glaze to keep overall sweetness restrained. These changes keep the pastry identity intact while meeting dietary needs.
Ingredients
- 2 1/4 cups gluten-free all-purpose flour (cup-for-cup blend)
- 1/2 cup tapioca starch
- 2 tablespoons sugar
- 1 teaspoon fine salt
- 2 1/4 teaspoons instant yeast
- 3/4 cup whole milk, warm (or dairy-free alternative)
- 2 large eggs, room temperature
- 10 tablespoons unsalted butter, very cold, plus extra for folding
- 1 teaspoon vanilla extract
- Zest of 1 lemon (optional)
- 1/2 cup pastry cream or almond cream for filling (optional)
Step by Step Instructions
- Whisk flours, tapioca starch, sugar, salt, and yeast in a large bowl until uniform.
- Mix warm milk, eggs, and vanilla; combine with dry ingredients to form a soft dough. Cover and rest 30 minutes.
- Roll dough into a rectangle on a lightly floured surface; chill 20 minutes to relax.
- Thinly slice the cold butter and arrange it in a centered slab; fold dough over and seal, then roll into a long rectangle.
- Perform the first fold: fold into thirds like a letter, rotate 90 degrees, chill 20 minutes. Repeat two more times for three folds total.
- After final rest, roll dough 1/4 inch thick, brush lightly with melted butter, and roll tightly into a log.
- Slice the log into 8 equal pieces, place each in a muffin tin or mold, and proof until puffy, about 45, 60 minutes.
- Bake at 190°C/375°F for 18, 22 minutes, until deep golden; cool briefly before glazing or filling.
Tips and Tricks for Success
Work cold. Keep butter and dough chilled between folds to preserve distinct layers and prevent smear. Measure flours by weight if possible; gluten-free flours vary in density and water absorption. Use a light touch when rolling: press to shape, not to compress. If the dough feels sticky, a brief chill will firm it without adding extra starch. Brush sparingly with butter before rolling to encourage separation, not saturation. When proofing, avoid overly warm spots to prevent collapse.
Ingredient Swaps
Use a cup-for-cup gluten-free blend with xanthan gum for best stability; if your blend lacks binder, add 1/2 teaspoon xanthan per cup. Swap tapioca with arrowroot for a cleaner finish but watch hydration. For dairy-free versions, a high-fat plant butter works if thoroughly chilled and kept firm during folding. If you prefer less sugar, halve it in the dough and finish with a thin honey brush after baking.
Pairings and Serving Suggestions
Serve warm with a small dollop of pastry cream or lightly sweetened ricotta to mirror the silky interior. A citrus curd brightens the pastry and cuts richness, while a dark-roast coffee balances the buttery notes. For brunch, pair with fresh berries and unsweetened Greek yogurt to introduce a textural contrast. Present on a shallow plate so the spiral silhouette is visible; garnish with a fine zest scatter for aroma.
Storage and Make Ahead Tips
Leftovers keep best wrapped at room temperature for a few hours, then chilled in an airtight container for up to two days. Reheat in a low oven to revive crispness rather than microwaving, which softens layers. Dough can be laminated and frozen after the final fold; thaw overnight in the refrigerator before shaping and proofing. Baked cruffins can be frozen, then refreshed in a 150°C/300°F oven for 8, 10 minutes.
Nutrition and Health Benefits
These cruffins provide a satisfying balance of carbohydrates and fats; using a gluten-free blend makes them suitable for those with gluten intolerance. Incorporating whole-ingredient fillings like nut-based creams adds protein and essential fatty acids. Choosing reduced-sugar options and serving with fresh fruit can lower overall glycemic impact while preserving sensory appeal. For specific dietary needs, please consult a qualified health professional.
Mistakes to Avoid
Avoid overworking the dough, which collapses layers and yields dense spirals; gentle rolls preserve lift. Do not let the butter soften too much during laminating, or it will smear and create a greasy texture. Underproofed cruffins will burst and remain heavy; give them time to puff and reveal defined layers. Finally, do not skip the chill periods those rests build structure and flavor for successful baking with gluten-free flours.
Personal Closing Thought and Call to Action
Baking Decadent Gluten Free Cruffins is an exercise in patience and precision that rewards with nuanced texture and restrained richness. Share the first batch warm with someone who will notice the crust-to-crumb arc. If this method inspires you, experiment with citrus or spice accents while keeping the lamination disciplined. Post a photo and tag the recipe source to join a quiet conversation about modern pastry techniques.
Conclusion
Decadent Gluten Free Cruffins deliver layered texture and refined flavor that suit both weekend baking and elevated brunch service. For a comparative flaky approach and extra technique notes, visit Decadent Gluten Free Cruffins to see a related take on laminated gluten-free pastry.
FAQ
What is the preparation time for this recipe?
The preparation time usually takes about 15 to 20 minutes depending on experience and equipment.
Can I substitute any ingredients?
Yes, simple substitutions are possible depending on dietary needs or availability.
Is this recipe suitable for specific diets?
Decadent Gluten Free Cruffins can be adapted with small changes depending on preferences and dietary requirements, such as using dairy-free butter or alternative flours.
How should leftovers be stored?
Store leftovers in an airtight container in the refrigerator and consume within two to three days.
Can I prepare this recipe in advance?
Many steps can be prepared ahead of time to simplify busy cooking days.
Decadent Gluten Free Cruffins
Decadent Gluten Free Cruffins feature a flaky, buttery exterior and a custard-soft interior, offering a contrasting pastry experience.
Total Time: 60 minutes
Yield: 8 servings 1x
Ingredients
Scale
- 2 1/4 cups gluten-free all-purpose flour (cup-for-cup blend)
- 1/2 cup tapioca starch
- 2 tablespoons sugar
- 1 teaspoon fine salt
- 2 1/4 teaspoons instant yeast
- 3/4 cup whole milk, warm (or dairy-free alternative)
- 2 large eggs, room temperature
- 10 tablespoons unsalted butter, very cold, plus extra for folding
- 1 teaspoon vanilla extract
- Zest of 1 lemon (optional)
- 1/2 cup pastry cream or almond cream for filling (optional)
Instructions
- Whisk flours, tapioca starch, sugar, salt, and yeast in a large bowl until uniform.
- Mix warm milk, eggs, and vanilla; combine with dry ingredients to form a soft dough. Cover and rest 30 minutes.
- Roll dough into a rectangle on a lightly floured surface; chill 20 minutes to relax.
- Thinly slice the cold butter and arrange it in a centered slab; fold dough over and seal, then roll into a long rectangle.
- Perform the first fold: fold into thirds like a letter, rotate 90 degrees, chill 20 minutes. Repeat two more times for three folds total.
- After final rest, roll dough 1/4 inch thick, brush lightly with melted butter, and roll tightly into a log.
- Slice the log into 8 equal pieces, place each in a muffin tin or mold, and proof until puffy, about 45, 60 minutes.
- Bake at 190°C/375°F for 18, 22 minutes, until deep golden; cool briefly before glazing or filling.
Notes
For best results, work with cold ingredients, and measure flours by weight if possible. Chill dough and butter fully between folds to maintain layers.
- Prep Time: 20 minutes
- Cook Time: 22 minutes
- Category: Pastry
- Method: Baking
- Cuisine: Gluten-Free
Nutrition
- Serving Size: 1 cruffin
- Calories: 280
- Sugar: 7g
- Sodium: 150mg
- Fat: 12g
- Saturated Fat: 7g
- Unsaturated Fat: 4g
- Trans Fat: 0g
- Carbohydrates: 38g
- Fiber: 2g
- Protein: 5g
- Cholesterol: 40mg
Frequently Asked Questions
How much time do gluten free cruffins take from start to finish?
Total time spans approximately 3 to 4 hours including multiple chilling periods. Active hands-on time is roughly 45 minutes. Most of the timeline involves resting and proofing, which you can break into morning and afternoon shifts for busy schedules. Dough can be prepared a day ahead and refrigerated to shorten the final shaping stage.
Can I make gluten free cruffins without dairy products?
Yes. Use a high-fat plant-based butter alternative that is thoroughly chilled before folding. Substitute warm milk with a non-dairy alternative like oat or almond milk. Ensure your dairy-free butter maintains firmness during the lamination process, as softening ruins layer separation. Keep it in the freezer between folds.
What causes gluten free cruffins to turn out dense instead of fluffy?
Dense cruffins typically result from skipped chilling periods, overworking the dough, or butter that softened during folding. Gentle rolling preserves lift and layer definition. Never skip rest periods between folds, as these rests build structure essential for gluten-free success. Underproofing also creates heavy, compact pastries.
How should I store baked gluten free cruffins for best freshness?
Keep leftovers wrapped at room temperature for a few hours, then store in an airtight container in the refrigerator for up to two days. Revive crispness by reheating in a 150°C/300°F oven for 8 to 10 minutes. Avoid microwaving, which softens the layers and destroys texture. Baked cruffins freeze well for up to one month.
What gluten-free flour blend works best for this recipe?
Use a certified gluten-free cup-for-cup blend containing rice, tapioca, and sorghum flour. Choose blends with xanthan gum already included for stability. If your blend lacks a binder, add half a teaspoon of xanthan gum per cup of flour. Measure by weight rather than volume for consistency, since gluten-free flours vary significantly in density.
Final Thoughts
Gluten free cruffins reward attentive baking with layered texture and refined flavor perfect for weekend projects or elevated brunch service. If you enjoy laminated pastries, explore the flaky technique in our Wisconsin Apple Kringle Recipe for another impressive gluten-free pastry approach. For a complementary dessert that showcases similar precision, try our Gluten-Free Chocolate Mousse Cake. Share your cruffins warm with someone who notices the crust-to-crumb arc. Tag your photos and join the conversation about modern pastry techniques.