
In this article:
- Why These Thumbprint Cookies Stay Tender and Never Crack
- Glossy Jam Centers and a Crumb That Melts
- Raspberry Thumbprint Cookies Ingredients
- How to Make Thumbprint Cookies, From Dough to Filled Wells
- No Cracks, No Spread: The Three Rules That Fix Thumbprints
- One Tray, Five Fillings: A Thumbprint for Every Taste
- Lighter Thumbprints and Simple Swaps
- Storing and Freezing Thumbprint Cookies
- FAQ

Why These Thumbprint Cookies Stay Tender and Never Crack
Raspberry thumbprint cookies succeed or fail on butter temperature. Butter that is soft but still cool creams into a dough that rolls smoothly and presses without splitting, while melted or greasy butter makes a dough that cracks at the edges the moment you form the well. The yolks do the second job. Two yolks, with no white, give the crumb a rich, sandy tenderness closer to a French sablé than to an ordinary sugar cookie, and they bind the dough so the walls of the well stay put in the heat. The chill is the third job, and it is not optional. Forty-five minutes in the refrigerator firms the butter again, so the cookies bake up thick and defined instead of spreading into flat, jam-spilling discs. Finally, the jam goes in before baking, measured at exactly half a teaspoon. That small amount sets into a glossy, jewel-like center as it warms, instead of bubbling over the sides and scorching on the pan. There is a heritage to this cookie worth knowing. In Sweden, the same little jam well is called hallongrottor, raspberry caves, and it has anchored coffee breaks for generations. Our version keeps that spirit, a humble dough made luxurious by butter and patience, and gives it the polish of a modern cookie box.Glossy Jam Centers and a Crumb That Melts
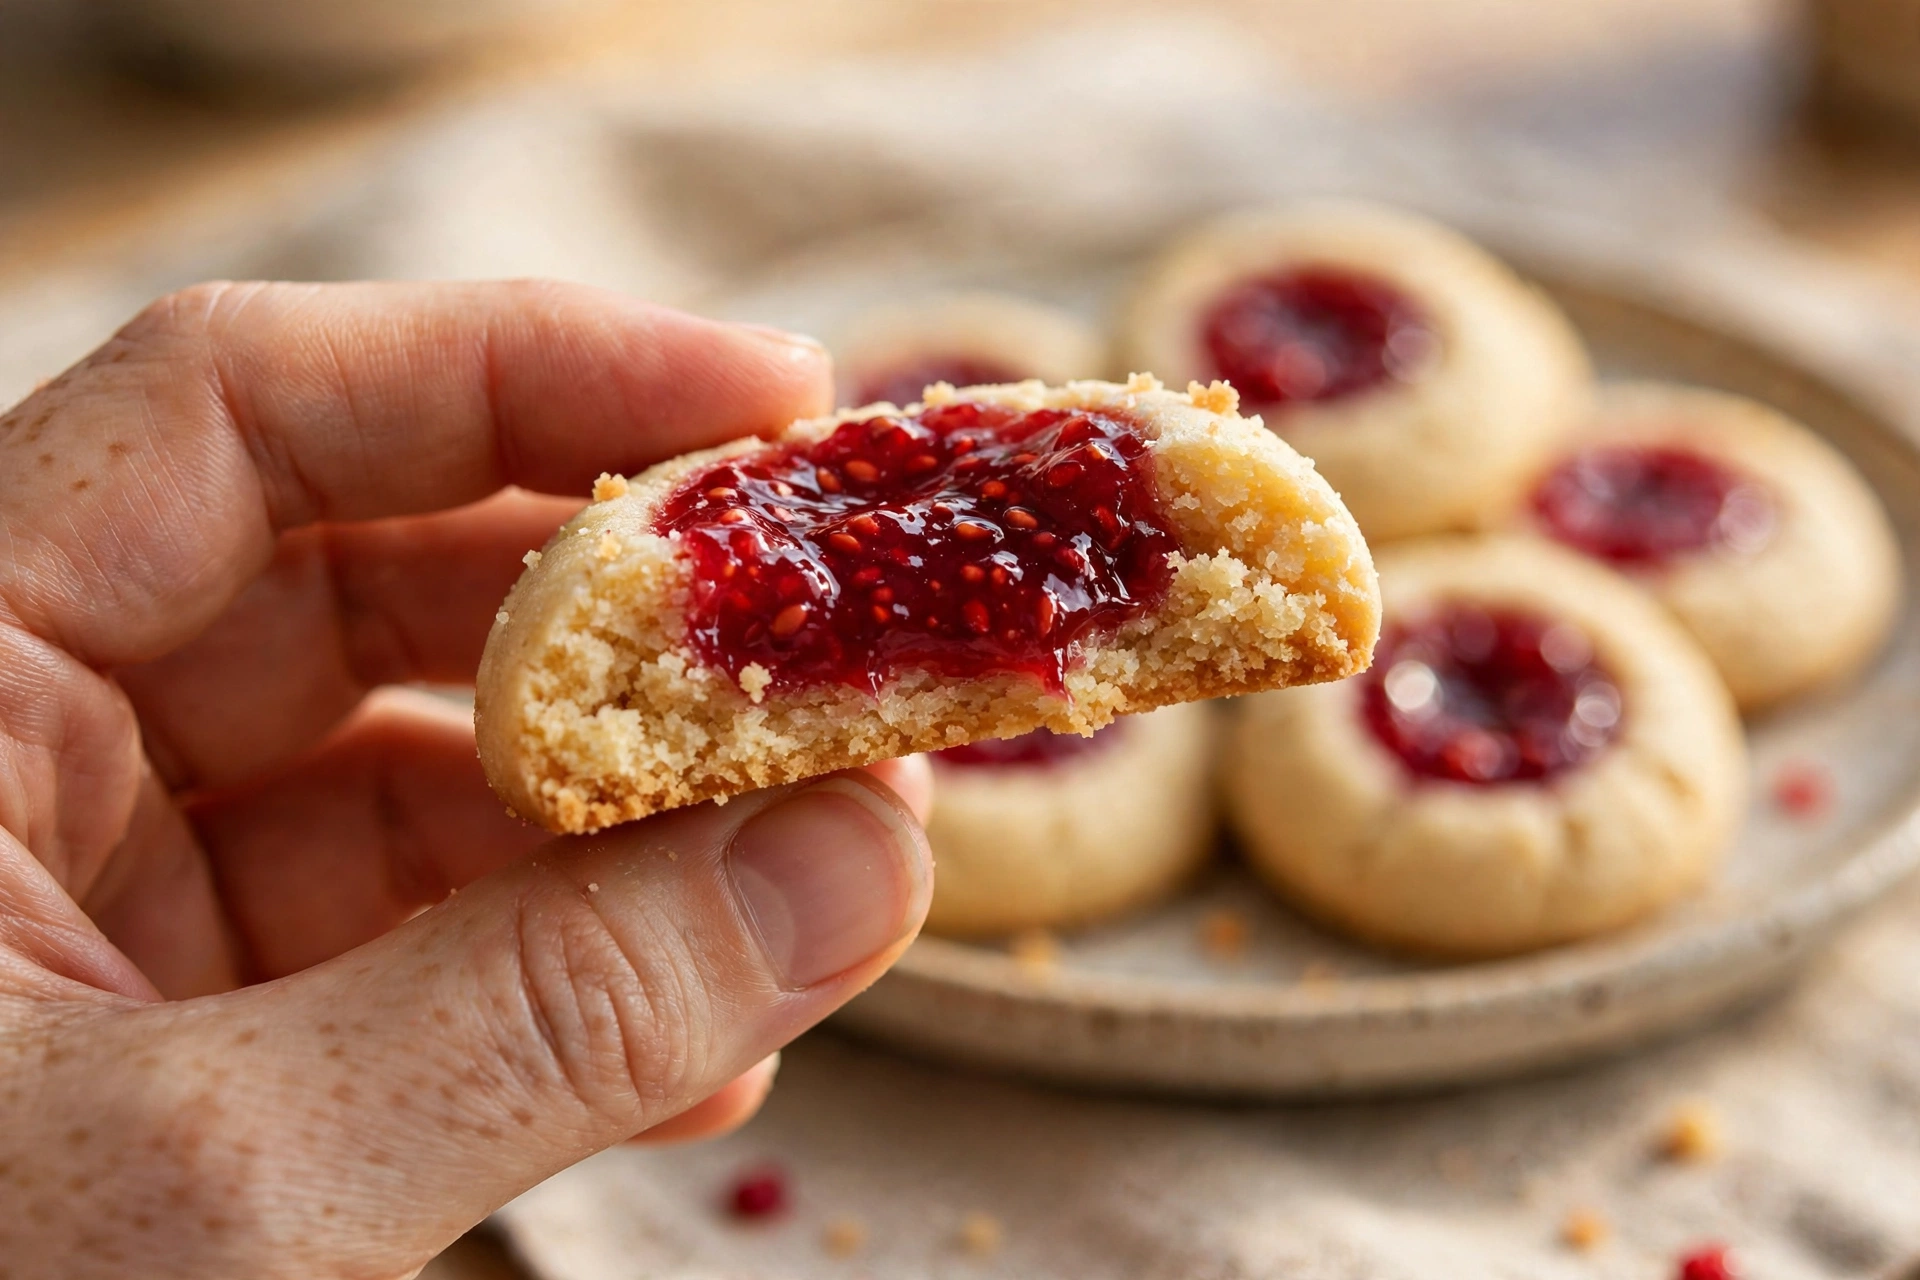
The first bite is a study in contrast. Your teeth meet a delicate, sandy edge, then the crumb gives way completely, dissolving into butter and vanilla before the jam arrives, bright and tart. Raspberry is the classic center for good reason. Its acidity cuts through the richness of the shortbread, and its deep red color reads as pure December against the pale gold dough. Warm from the oven, the jam is molten and shining; cooled, it sets into a soft, chewy jewel that stays put when the cookie is picked up, stacked, or tucked into a gift tin. A whisper of almond extract in the dough stays in the background, the way it does in good bakery cookies. You cannot name it, but the flavor tastes rounder, more finished, like the cookies from a shop you trust. The crumb itself should stay pale. Thumbprints are done when the edges are barely golden and the tops still look blond; that restraint is what keeps them tender for days instead of crisping into biscuits. Served on a plate with coffee or tucked beside a scoop of vanilla ice cream, they eat like a miniature jam tart, which is exactly what they are. Size plays its own role in the pleasure. At one tablespoon of dough, each cookie is a true two-bite piece, rich enough to satisfy and small enough to invite a second. Platters of them disappear in a way that bigger cookies never quite manage. The aroma while they bake is quiet but persuasive: warm butter, vanilla, then the jam turning jammy and concentrated at the edges. It is the smell that brings people into the kitchen before the timer sounds.Raspberry Thumbprint Cookies Ingredients
Everything here is a pantry staple, and the one choice that matters is the jam. Pick a thick, seedless raspberry jam with real body; thin, runny preserves will liquefy in the oven and escape their wells.- 1 cup unsalted butter (2 sticks), softened but still cool
- 2/3 cup granulated sugar (135 grams)
- 2 large egg yolks, at room temperature
- 2 teaspoons vanilla extract
- 1/2 teaspoon almond extract (optional, for bakery depth)
- 2 1/4 cups all-purpose flour (280 grams)
- 1/2 teaspoon fine sea salt
- 1/2 cup thick seedless raspberry jam
- Powdered sugar, for a light dusting (optional)
How to Make Thumbprint Cookies, From Dough to Filled Wells
The dough comes together in minutes, and the shaping is the kind of quiet kitchen work that suits a December afternoon. A small cookie scoop keeps every ball the same size, which keeps every cookie baked to the same tenderness.- Beat the butter and granulated sugar in a large bowl until pale, fluffy and visibly lighter, 2 to 3 minutes. This step whips in the air that keeps the crumb delicate.
- Beat in the egg yolks one at a time, then the vanilla and almond extract, until the mixture looks smooth and glossy.
- Add the flour and salt, and mix on low just until a soft dough forms with no dry streaks. Stop the moment it comes together; overmixing toughens shortbread.
- Cover and chill the dough for 45 minutes, until firm enough to scoop cleanly. This rest keeps the cookies from spreading.
- Heat the oven to 350°F (175°C). Line two baking sheets with parchment paper.
- Scoop 1 tablespoon balls of dough, roll them smooth between your palms, and set them 2 inches apart on the sheets.
- Press a deep well into the center of each ball with your thumb or the floured handle of a wooden spoon. If an edge cracks, pinch it closed with your fingers; the dough is forgiving.
- Fill each well with exactly 1/2 teaspoon of jam. Level or heaped jam will bubble over, so keep the measure honest.
- Bake 13 to 15 minutes, until the edges are barely golden and the jam shines and trembles slightly. The tops should stay pale.
- If a well puffed up in the oven, press it gently once more with the spoon handle while the cookies are hot. Cool 5 minutes on the sheet, then move to a rack.
- Dust lightly with powdered sugar if you like, keeping the dusting on the cookie and off the glossy jam.
No Cracks, No Spread: The Three Rules That Fix Thumbprints
Most thumbprint cookies fail in one of two ways, and both are easy to prevent. Cracks appear when cold, stiff dough is pressed too fast; the fix is to let scooped balls stand 5 minutes and to press slowly, with a floured tool, in one confident motion. A second cause of cracks is dry dough from too much flour. Spoon the flour into the cup and level it, or weigh it; a packed cup can add a quarter cup extra and turn a tender dough crumbly. Spreading has a different culprit: warm butter. If the dough feels soft or shiny at shaping time, return the tray of shaped balls to the refrigerator for 15 minutes before filling and baking. The third rule concerns the jam. Jam added after baking sits in a shallow, raw-tasting puddle; jam baked with the cookie melds into the crumb and glows. Half a teaspoon, no more, is the measure that keeps it in place. If your jam is thin, stir in it a pinch of cornstarch before filling, or simmer it for two minutes to thicken. Thirty seconds of effort saves a tray of overflowed cookies. One more quiet habit separates tidy trays from messy ones: rotate the pan halfway through baking. Home ovens run hot at the back, and even color, pale gold all around, is the visual signature of a well-made batch. The cookies at the front deserve the same finish as the ones at the back.One Tray, Five Fillings: A Thumbprint for Every Taste
Once the base dough is yours, the wells become a canvas. A mixed tray is the fastest way to make a cookie plate look abundant, and guests love choosing their own center. Apricot jam gives a golden, honeyed sweetness that suits the almond note in the dough. Lemon curd bakes into a bright, sunny center that tastes like a miniature lemon tart. For chocolate lovers, fill the wells after baking with a spoonful of warm ganache; the one filling that must wait for the oven, since chocolate scorches at the edges if baked the whole time. A small spoonful of dulce de leche, added before baking, turns caramel-deep and chewy. And a mixed-berry or cherry preserve makes a darker, moodier tray for evening serving. Keep the dough and the method identical for every filling. Only the center changes, which means one bowl of dough can become the most varied plate on the table. For a presentation that looks deliberate, arrange the tray in families: a row of raspberry, a row of apricot, a row of dark cherry. The pattern reads as abundance, and a dusting of powdered sugar over only the cookie rims, never the jam, makes each center look lit from within. When this tray anchors a bigger holiday spread, round out the table with our Thanksgiving dinner menu and save room for a slice of classic pecan pie, the deep, gooey finish pie lovers wait for all year.Lighter Thumbprints and Simple Swaps
These are celebration cookies, but the recipe adapts gracefully. Each finished cookie has about 118 calories, 15 grams of carbohydrate, 6 grams of fat and 8 grams of sugar, so a pair with coffee is a modest pleasure, not a project of restraint. For a lighter crumb, replace a quarter of the butter with an equal amount of Greek yogurt and expect a slightly softer, cakier cookie. The wells hold jam just as well. A one-to-one gluten-free flour blend works cleanly here because the dough is pressed, not rolled; add one extra tablespoon if the blend feels sticky, and chill a full hour. Sugar-free raspberry preserves make an easy lower-sugar center, and the dough itself tolerates a granular sweetener blend in place of the sugar, with a marginally more delicate crumb. Dairy-free sticks substitute for the butter one to one. Choose a stick with real structure, not a soft spread, so the wells keep their walls in the oven.Storing and Freezing Thumbprint Cookies
Baked thumbprint cookies keep for 5 days in a tin at room temperature, layered between sheets of parchment so the jam centers never touch the cookie above them. For longer keeping, freeze the unbaked dough balls, well pressed but unfilled, on a tray until solid, then bag them for up to 3 months. Thaw overnight in the refrigerator, fill with jam, and bake fresh; the centers stay glossy and bright. Baked cookies also freeze, for up to 2 months, though the jam loses a little of its shine. A minute in a low oven brings back their just-baked warmth before serving. For a cookie exchange, bake the morning of the event if you can. These are the rare cookies that travel well and still taste like the bakery case, three days later, from a tin. If you are shipping a box, thumbprints are sturdy travelers. Pack them snugly in a single layer per section of the box so nothing shifts, choose the thickest jam you have, and skip the powdered sugar dusting, which clouds in transit. They will arrive looking composed, which is more than most holiday cookies can promise. Raspberry thumbprint cookies are the ones people remember from a crowded tray: a buttery crumb that melts, a ruby center that glows, and a shape that looks far more difficult than it is. Make one batch exactly as written, learn how the dough feels at the right softness, and the rest of the season is easy. The tray, as they say at our house, decorates itself.FAQ
Why do my thumbprint cookies crack when I press the well?
Cracks mean the dough is too cold or too dry. Let the scooped balls stand 5 minutes before pressing, press slowly with a floured wooden spoon handle, and pinch any small crack closed with your fingers. If cracks persist, the flour was likely packed; spoon and level it, or weigh 280 grams.
Why did my thumbprint cookies spread flat in the oven?
Spreading comes from warm butter. The dough should feel cool and matte when shaped; if it looks shiny, chill the shaped balls 15 minutes before filling. Also confirm the 45 minute dough chill happened; it is what sets the butter before the heat does.
How much jam goes in each thumbprint cookie?
Exactly 1/2 teaspoon per cookie. More than that bubbles over the edges and scorches on the pan, and much less leaves a dry, shallow center. A thick, seedless jam holds its shape best; thin preserves can be simmered 2 minutes to thicken before filling.
Can I freeze thumbprint cookie dough before baking?
Yes, and it is the best make-ahead route. Shape the balls, press the wells, and freeze solid on a tray before bagging for up to 3 months. Thaw overnight in the refrigerator, then fill with jam and bake as directed for glossy, fresh-tasting centers.
The wells puffed up and nearly closed while baking. How do I fix that?
It happens when the dough is slightly under-chilled. As soon as the tray leaves the oven, press each well once more with the spoon handle while the cookies are hot and soft. They set within minutes, and the fresh well takes the jam neatly if it drifted.

Raspberry Thumbprint Cookies
Buttery shortbread thumbprint cookies with yolk-rich, melt-in-your-mouth crumbs and glossy raspberry jam centers. A chill-first dough, wells pressed twice, and exactly half a teaspoon of jam per cookie stop the cracks and spreading that ruin most batches.
- Total Time: 1 hour 25 minutes
- Yield: 30 cookies 1x
Ingredients
- 1 cup unsalted butter (2 sticks), softened but still cool
- 2/3 cup granulated sugar (135 grams)
- 2 large egg yolks, at room temperature
- 2 teaspoons vanilla extract
- 1/2 teaspoon almond extract (optional)
- 2 1/4 cups all-purpose flour (280 grams)
- 1/2 teaspoon fine sea salt
- 1/2 cup thick seedless raspberry jam
- Powdered sugar, for dusting (optional)
Instructions
- Beat the butter and granulated sugar until pale and fluffy, 2 to 3 minutes.
- Beat in the egg yolks one at a time, then the vanilla and almond extract, until smooth and glossy.
- Add the flour and salt and mix on low just until a soft dough forms with no dry streaks.
- Cover and chill the dough for 45 minutes, until firm enough to scoop cleanly.
- Heat the oven to 350°F (175°C). Line two baking sheets with parchment paper.
- Scoop 1 tablespoon balls, roll smooth, and set 2 inches apart on the sheets.
- Press a deep well into each ball with your thumb or the floured handle of a wooden spoon. Pinch any cracks closed.
- Fill each well with exactly 1/2 teaspoon of jam.
- Bake 13 to 15 minutes, until the edges are barely golden and the jam shines. Keep the tops pale.
- If a well puffed up, press it once more with the spoon handle while hot. Cool 5 minutes on the sheet, then move to a rack.
- Dust lightly with powdered sugar if you like, keeping it off the jam.
- Prep Time: 25 minutes
- Cook Time: 14 minutes