
Pumpkin Dump Cake
The first time someone told me about pumpkin dump cake, I’ll admit I laughed a little. You just… dump everything in a pan? No mixing bowls, no creaming butter and sugar, no careful folding? It sounded like one of those internet shortcuts that promises the world and delivers a soggy mess. But it was the Tuesday before Thanksgiving, my oven was already booked solid with a turkey and two pies, and I needed one more dessert that wouldn’t demand my full attention. So I tried it.
Forty-five minutes later, I pulled a golden, bubbling, buttery masterpiece out of the oven, and I’ve never looked back. This pumpkin dump cake has become my secret weapon every fall. It tastes like someone spent all afternoon layering a pumpkin pie with a pecan crumble topping, but the actual hands-on work takes about ten minutes. The magic is in the method: a spiced pumpkin custard base that bakes up silky and rich, crowned with a buttery, crisp cake-mix topping that shatters beautifully under your spoon.
If you’ve been searching for an easy pumpkin dump cake recipe that delivers bakery-level results with almost zero effort, this is the one, whether you’re feeding a Thanksgiving crowd or just craving something warm and spiced on a chilly October evening.
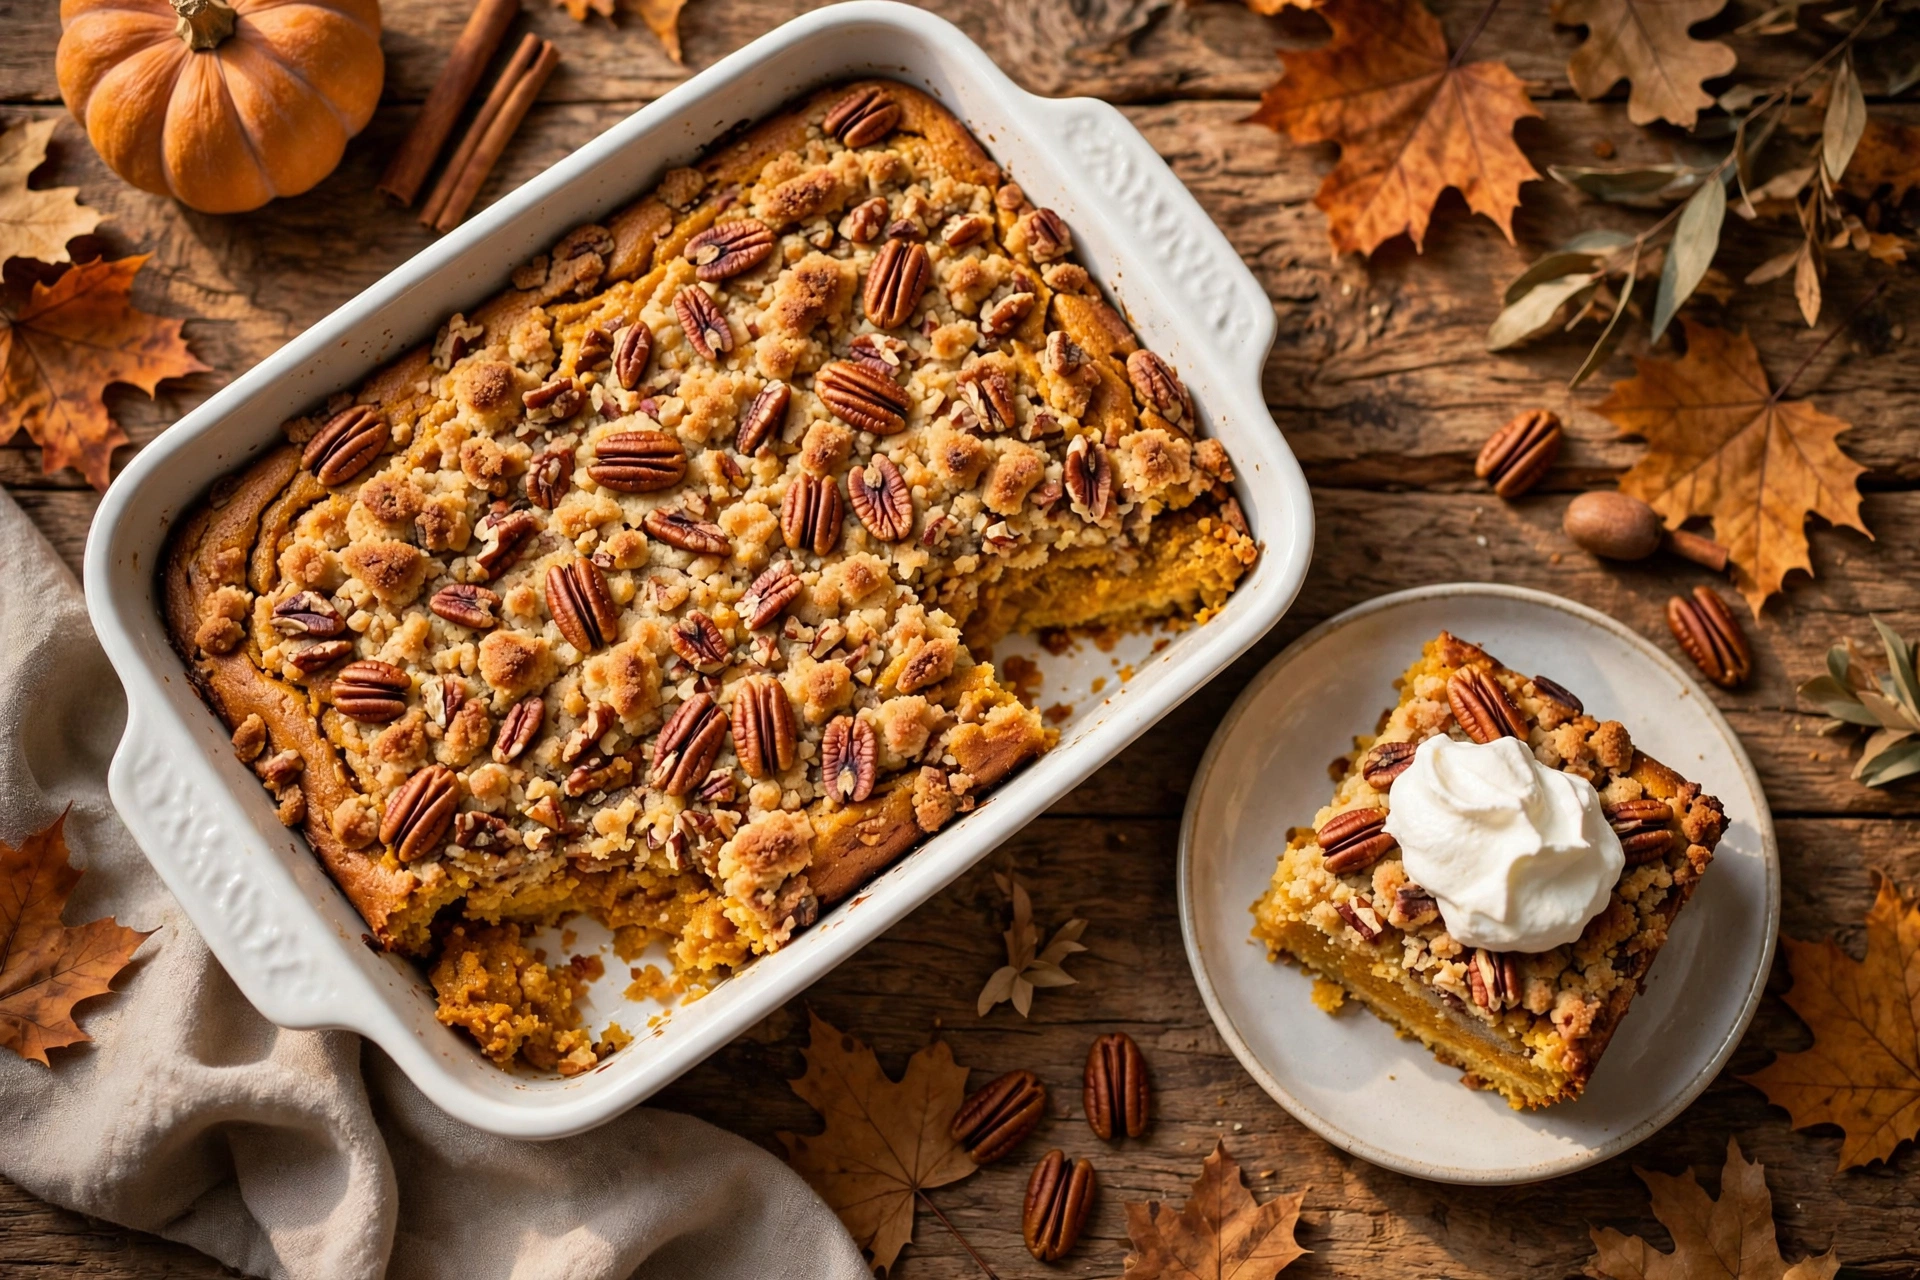
Table of Contents
- The Science and Secrets of Pumpkin Dump Cake Perfection
- Chef’s Tip: Freeze Your Butter and Grate It
- Ingredients & Substitutions
- Step-by-Step Instructions
- Time-Saving Shortcut
- Storage & Make-Ahead Tips
- Common Mistake to Avoid
- Nutritional Benefits of Key Ingredients
- Conclusion: Your New Fall Tradition Starts Here
- Frequently Asked Questions
The Science and Secrets of Pumpkin Dump Cake Perfection
What makes a pumpkin dump cake work, and what separates a great one from a gummy, underbaked disappointment, comes down to a little bit of kitchen chemistry. Understanding it will make you a dump cake master, not just a recipe follower.
The foundation is a simple pumpkin custard: canned pumpkin puree, evaporated milk, eggs, and sugar, whisked with warm spices. When this mixture bakes, the egg proteins set into a delicate network that traps moisture, creating that silky, pie-like filling. The key ratio here matters enormously. Too much liquid and the eggs can’t set the custard before the top over-browns; too little and you get a dense, dry brick. The classic formula is one large can of pumpkin (29 ounces), one can of evaporated milk, and three eggs, which hits the sweet spot that food scientists call a “soft set”: firm enough to slice, tender enough to melt in your mouth.
The topping is where the real science happens. A dry yellow cake mix, scattered evenly over the wet pumpkin layer and dotted with cold butter, undergoes something wonderful in the oven’s heat. The butter melts downward through the dry mix, hydrating the flour and sugar while its milk solids brown. That’s the Maillard reaction, the same browning magic behind toasted bread and seared steak. Meanwhile, the topmost layer of dry mix crisps into a golden, cookie-like crust. The result is a dessert with two distinct textures in every bite: creamy pumpkin below, buttery crunch above.
Temperature control is your quiet ally here. Baking at 350°F (175°C) gives the custard time to set gently while the topping browns at exactly the right pace. Crank the heat higher and the cake mix burns before the center firms up; go lower and the topping never achieves that craveable crispness. Patience at 350°F is the whole secret, and a 20-minute rest after baking lets the custard finish setting for clean, beautiful slices.
Chef’s Tip: Freeze Your Butter and Grate It
Here’s the single tip that will elevate your pumpkin dump cake from good to unforgettable: freeze your butter solid, then grate it over the cake mix with a box grater instead of slicing cold pats on top.
Sliced pats of butter leave gaps. Dry, powdery patches of unhydrated cake mix taste floury and raw no matter how long you bake. Grated frozen butter, on the other hand, distributes in a fine, even snowfall across the entire surface. Every square inch of cake mix gets its share of melting butterfat, which means uniform browning, no dry spots, and a topping that crunches edge to edge like the best streusel you’ve ever had.
Use two sticks (one cup) of real butter: not margarine, not a butter substitute. The milk solids in real butter are what brown and create that deep, toasty flavor. Grate it straight from the freezer over the pan, working quickly so it doesn’t soften in your hands, and you’ll wonder why you ever did it any other way.
Ingredients & Substitutions
This pumpkin dump cake recipe keeps things beautifully simple. Here’s what you’ll need, plus smart swaps for common dietary needs and pantry gaps.
For the pumpkin layer:
- 1 can (29 oz) pumpkin puree (must say “100% pumpkin,” not “pumpkin pie filling,” which is pre-sweetened and pre-spiced)
- 1 can (12 oz) evaporated milk (richness without the heaviness of cream)
- 3 large eggs, at room temperature (they blend more smoothly into the custard)
- 1 cup granulated sugar
- 1 tsp cinnamon, 1/2 tsp ginger, 1/4 tsp nutmeg, 1/4 tsp cloves, 1/2 tsp salt
For the topping:
- 1 box (15.25 oz) yellow cake mix (any brand)
- 1 cup (2 sticks) unsalted butter, frozen (see the Chef’s Tip above)
- 1 cup chopped pecans (optional but highly recommended)
Substitutions that actually work:
- No evaporated milk? Use 1 1/2 cups half-and-half or whole milk. Avoid skim: the filling needs fat to set.
- Dairy-free? Full-fat canned coconut milk plus a frozen plant-based butter stick, grated the same way.
- Gluten-free? A gluten-free yellow cake mix performs beautifully here.
- Spice shortcut: 2 1/2 tsp pumpkin pie spice instead of the individual spices.
- Nut allergy? Skip the pecans or scatter 1/2 cup old-fashioned oats over the cake mix for crunch.
- Less sugar? Reduce to 3/4 cup. The cake mix brings its own sweetness.
Stick with yellow cake mix for the richest, most buttery result. Spice cake mix is a fun variation once you’ve mastered the classic.
Step-by-Step Instructions
Prep time: 10 minutes | Bake time: 50 to 60 minutes | Rest time: 20 minutes | Serves: 12 to 15
Step 1: Preheat and prepare your pan
Position a rack in the center of the oven and preheat to 350°F (175°C). Grease a 9×13-inch baking dish. Light-colored metal or ceramic works best, since dark pans brown the edges too aggressively.
Step 2: Whisk the pumpkin custard
In a large bowl, combine the pumpkin puree, evaporated milk, eggs, sugar, cinnamon, ginger, nutmeg, cloves, and salt. Whisk until completely smooth with no streaks of egg remaining, about one minute. The mixture will be pourable, like a thin milkshake. That’s exactly right.
Step 3: Pour into the baking dish
Pour the pumpkin mixture into the prepared dish and spread it even with a spatula, popping any large bubbles on the surface.
Step 4: Scatter the dry cake mix
Sprinkle the yellow cake mix evenly over the pumpkin layer, breaking up lumps with your fingers. Cover edge to edge. Bare spots mean missing crunch. Do not stir. The layering is the whole point of a dump cake.
Step 5: Add the pecans
Scatter the chopped pecans over the dry cake mix. They’ll toast as the cake bakes and become one with the crust.
Step 6: Grate the frozen butter over everything
Working quickly, grate the frozen butter over the entire surface using the large holes of a box grater. Aim for complete coverage. You should barely see cake mix peeking through. This guarantees a uniformly golden, crunchy top with zero floury patches.
Step 7: Bake until golden and set
Bake 50 to 60 minutes, until the topping is deeply golden all over, the edges bubble gently, and the center jiggles only slightly when you nudge the pan, like a perfectly baked pumpkin pie. If the top browns too fast, tent loosely with foil for the last 15 minutes.
Step 8: Cool, then serve
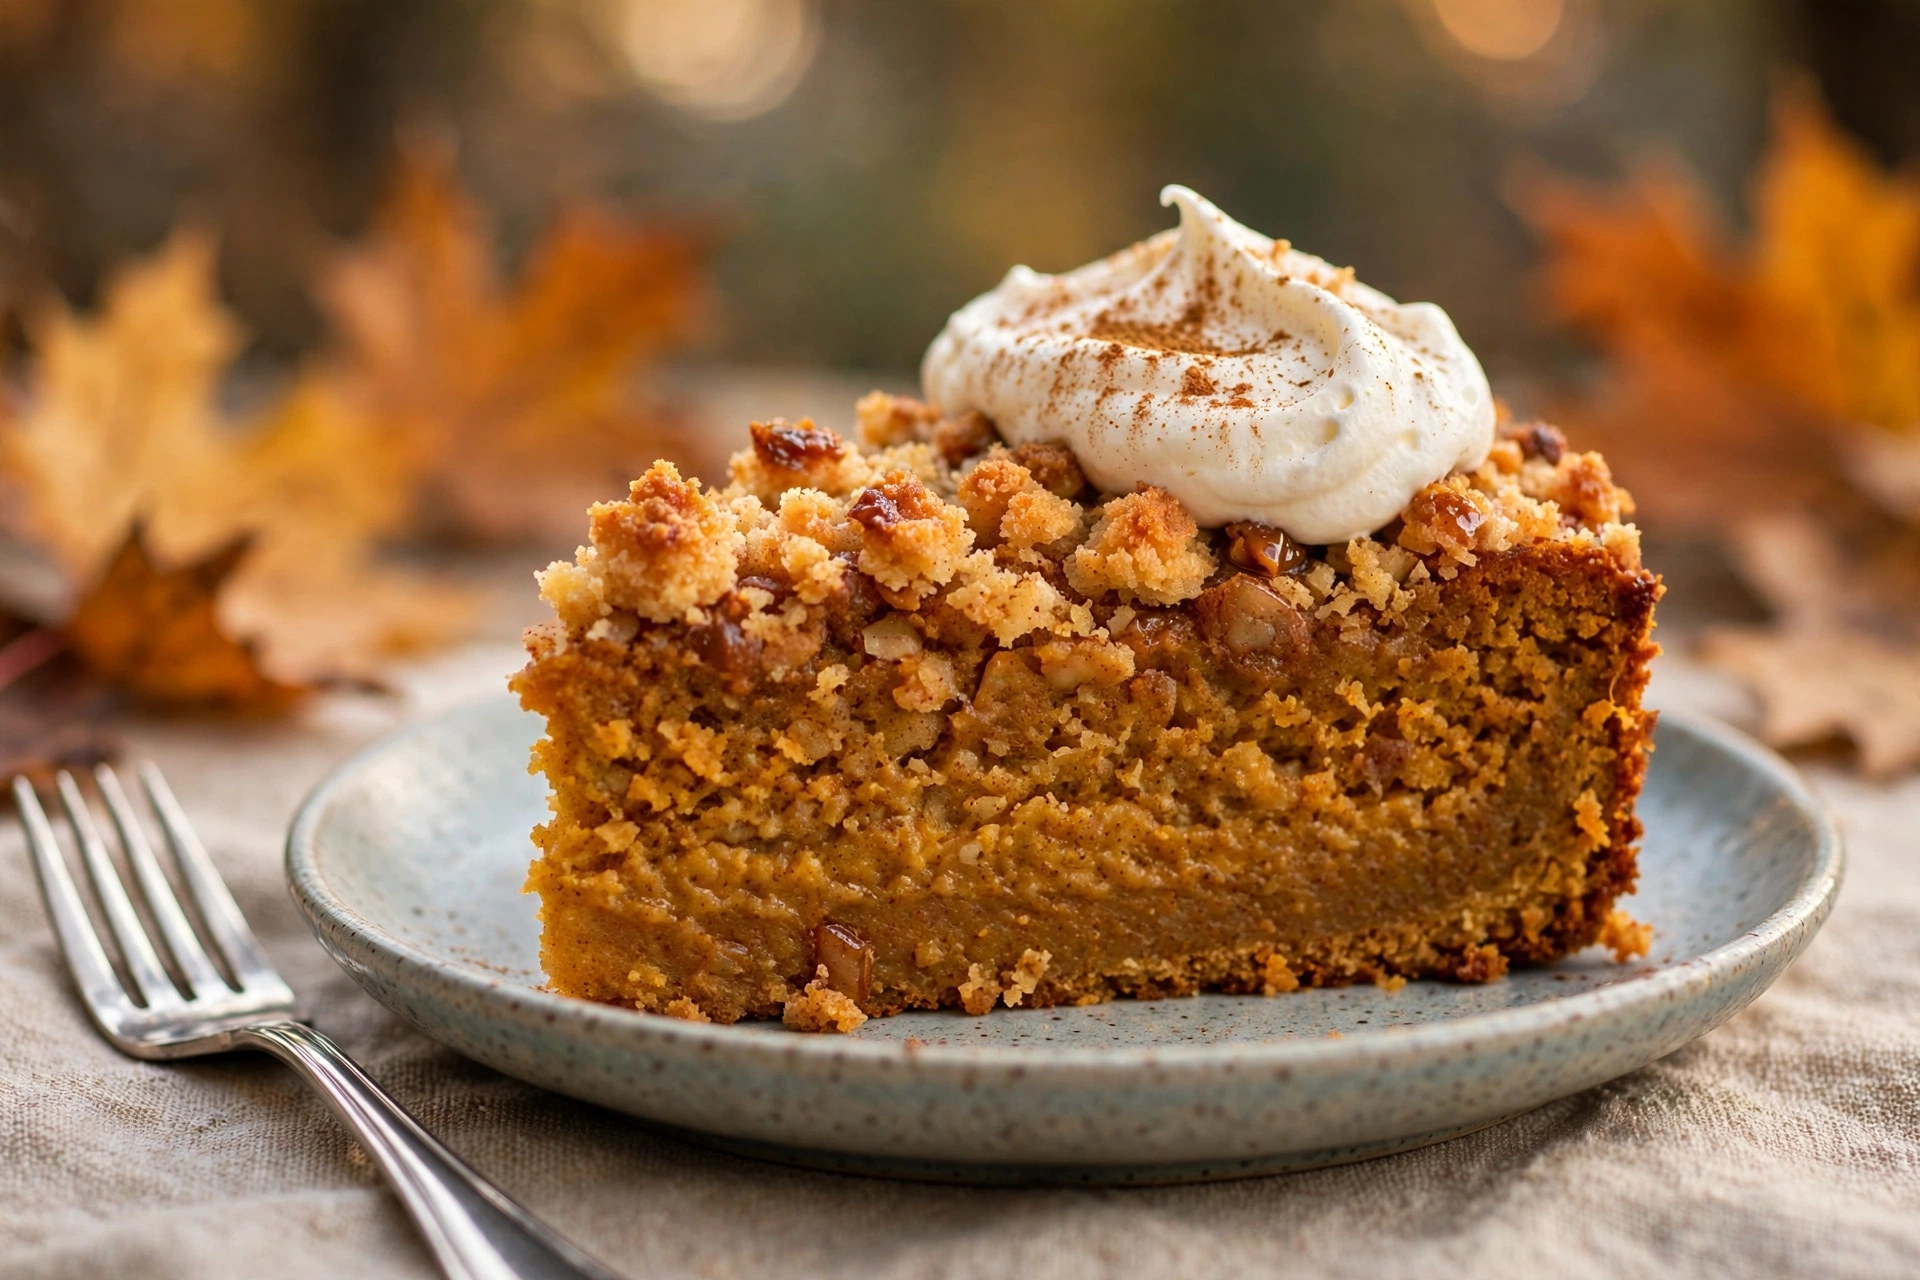
Let the cake rest on a wire rack for at least 20 minutes (30 is even better). The custard finishes setting as it cools, and cutting too early gives you pudding instead of clean slices. Serve warm, at room temperature, or chilled. Whipped cream or vanilla ice cream on top is never wrong.
Pumpkin Dump Cake
An easy fall dessert: silky spiced pumpkin custard topped with buttery crisp cake-mix crumble and toasted pecans.
-
Total Time:
1 hour 25 minutes -
Yield:
12 servings 1x
Ingredients
Scale
- 1 can (29 oz) pumpkin puree
- 1 can (12 oz) evaporated milk
- 3 large eggs, room temperature
- 1 cup granulated sugar
- 1 tsp ground cinnamon
- 1/2 tsp ground ginger
- 1/4 tsp ground nutmeg
- 1/4 tsp ground cloves
- 1/2 tsp salt
- 1 box (15.25 oz) yellow cake mix
- 1 cup (2 sticks) unsalted butter, frozen
- 1 cup chopped pecans (optional)
Instructions
- Preheat oven to 350F (175C). Grease a 9×13-inch baking dish.
- Whisk pumpkin puree, evaporated milk, eggs, sugar and spices until smooth; pour into dish.
- Sprinkle dry cake mix evenly over the pumpkin layer. Do not stir.
- Scatter pecans over the cake mix, then grate frozen butter evenly on top.
- Bake 50-60 minutes until deeply golden and the center jiggles only slightly.
- Cool at least 20 minutes before slicing. Serve warm with whipped cream.
- Prep Time: 10 minutes
- Cook Time: 55 minutes
- Category: Desserts
- Cuisine: American
Time-Saving Shortcut
In a real hurry? Use 2 1/2 teaspoons of pumpkin pie spice instead of the individual spices, and drizzle 3/4 cup of melted butter over the cake mix instead of grating frozen butter. Skip the pecans. Prep drops to about 5 minutes and the result is still 90% as good. Save the grated-butter technique for when you’re impressing guests. For another easy fall baking win, try our quick cinnamon rolls.
Another genuine time-saver: assemble the whole pumpkin dump cake in the morning, cover it tightly, and refrigerate it unbaked for up to 24 hours. When you’re ready, put the cold dish straight into your preheated oven and add 5 to 10 minutes to the bake time. The topping actually benefits from the rest. The cake mix hydrates slightly from the steam below, which reduces any risk of dry spots even further.
Storage & Make-Ahead Tips
Pumpkin dump cake is one of those rare desserts that keeps beautifully, making it ideal for holiday planning when oven space and time are both precious.
- Room temperature: Once completely cooled, cover the baking dish tightly and keep at room temperature for up to 24 hours. The topping stays crispest on day one.
- Refrigerator: Cover and refrigerate for up to 5 days. The topping softens somewhat. A 10-minute reheat in a 325°F oven brings back much of the crunch.
- Freezer: Yes, it freezes well. Cool completely, then wrap the whole dish (or individual portions) tightly in plastic wrap followed by aluminum foil. Freeze for up to 3 months. Thaw overnight in the refrigerator and warm in a 325°F oven for 15 to 20 minutes before serving.
- Make-ahead for Thanksgiving: Bake the pumpkin dump cake up to 2 days before the big day and refrigerate. On Thanksgiving, warm it in the oven while the turkey rests. That 30-minute resting window is the perfect reheating slot, and your kitchen will smell like autumn heaven right as guests sit down.
- Serving tip: This dessert is fantastic served warm with barely-sweetened whipped cream. For a dinner-party flourish, add a tiny pinch of cinnamon to the cream and a drizzle of salted caramel over each slice.
Common Mistake to Avoid
The number one mistake people make with pumpkin dump cake is underbaking it out of fear of burning the top. I see it constantly: the topping looks golden at 40 minutes, the baker panics and pulls it out, and the center is still liquid custard soup.
Here’s the truth: a deeply golden, even slightly dark topping is correct. That color is caramelization, not burning, and it’s where the flavor lives. The center, meanwhile, needs the full 50 to 60 minutes for the eggs to set the custard. Trust the jiggle test over the clock: nudge the pan gently, and the center should wobble like set gelatin, not slosh like liquid. The very center may look slightly underdone when the edges are perfect. That’s fine, because carryover heat and the 20-minute rest will finish the job.
If your oven runs hot and the top is getting dark at 45 minutes while the center still sloshes, don’t pull it. Tent it with foil and give it the full time. An extra 10 minutes under foil never hurt a dump cake, but 10 minutes less in the oven always does.
The second most common mistake: using pumpkin pie filling instead of plain pumpkin puree. Pie filling is pre-sweetened and pre-spiced, so your dessert comes out cloying and one-dimensionally spiced. Always check the can. You want the ingredient list to say one thing: pumpkin.
Nutritional Benefits of Key Ingredients
Pumpkin dump cake is unapologetically a dessert, but its star ingredient brings more than autumn flavor. According to the USDA FoodData Central database, canned pumpkin is one of the most nutrient-dense pantry staples you can keep.
Pumpkin is loaded with vitamin A. One serving delivers well over a day’s worth, thanks to the beta-carotene behind its vivid orange color. It also brings fiber, potassium, vitamin C, and iron to the party.
Eggs contribute high-quality protein and choline, plus the structure that makes the silky custard layer possible.
Pecans add heart-healthy monounsaturated fats, magnesium, and fiber. Toasting them in the oven deepens their flavor beautifully.
Cinnamon and warming spices aren’t just flavor: cinnamon has been studied for its potential to help moderate blood sugar response after meals, a welcome quality in a dessert.
None of this makes pumpkin dump cake health food. But as desserts go, one built on real pumpkin, eggs, and nuts is a far more nourishing choice than most bakery-case alternatives.
| Nutrition Facts (per serving, 1 of 12) | |
|---|---|
| Calories | 385 |
| Total Fat | 21g |
| Saturated Fat | 11g |
| Cholesterol | 95mg |
| Sodium | 380mg |
| Total Carbohydrates | 46g |
| Dietary Fiber | 3g |
| Total Sugars | 32g |
| Protein | 5g |
| Vitamin A | 180% DV |
| Iron | 10% DV |
Estimates based on standard ingredients; values vary with substitutions and serving size.
Conclusion: Your New Fall Tradition Starts Here
There are recipes you make once, and then there are recipes that quietly become part of how your family does autumn. This pumpkin dump cake is the second kind: the dessert you’ll bring to Friendsgiving when you only have an hour, the one your kids will ask for by name every October.
Ten minutes of effort. A short list of pantry staples. One baking dish to wash. And a result that tastes like you spent the whole afternoon in the kitchen. That’s not a shortcut. That’s just smart cooking. Preheat that oven, grab a can of pumpkin, and make it this week. And if one pumpkin dessert is never enough in October, our pumpkin cinnamon muffins are another cozy fall bake worth trying.
Can I make pumpkin dump cake ahead of time?
Yes. Bake up to 2 days ahead, cover tightly, and refrigerate. Reheat at 325°F (165°C) for 15 to 20 minutes to re-crisp the topping. You can also assemble it unbaked 24 hours ahead; add 5 to 10 minutes to the bake time when baking from cold.
What’s the difference between pumpkin puree and pumpkin pie filling?
Puree is just cooked pumpkin. That’s what you need. Pie filling is pre-sweetened and pre-spiced, which makes the dessert cloying. Check the label: the ingredients should list only pumpkin.
Can I use fresh pumpkin instead of canned?
You can, but roast, puree, and drain it until it matches canned thickness (about 3 1/2 cups). Canned is more consistent in texture and moisture, which is why most bakers prefer it for custard desserts.
Why is my topping dry and powdery in spots?
Dry patches mean the butter didn’t cover the cake mix evenly. The classic cause is sliced pats with gaps between them. Fix it with the grated frozen butter method in the Chef’s Tip: grating distributes butterfat across every inch, so no flour pockets survive.
Can I make pumpkin dump cake in a slow cooker?
Yes. Layer everything in a greased slow cooker in the same order, cover, and cook on HIGH 2 to 2 1/2 hours or LOW 4 hours, until the center is set. Prop the lid slightly ajar for the last 30 minutes so steam escapes and the topping crisps a little.
Is pumpkin dump cake served warm or cold?
Both. Warm, the topping is crispiest and the custard silky. Chilled overnight, it slices like a pumpkin bar. Try it warm first. That’s how most people fall in love with it.
You might also like:
- Quick Cinnamon Rolls: another easy fall baking win with minimal effort
- Rugelach: buttery, flaky pastry perfect for the holidays