
In this article:
- The ridges are not decoration
- A clean snap, then pure butter
- One dough, five shapes, one afternoon
- The stiff dough rescue
- What goes into the dough
- Piping and baking, step by step
- Keep the ridges sharp
- Chocolate, cherry or almond
- Three weeks in the tin
- Better than the tin you remember
- Danish butter cookie questions, answered
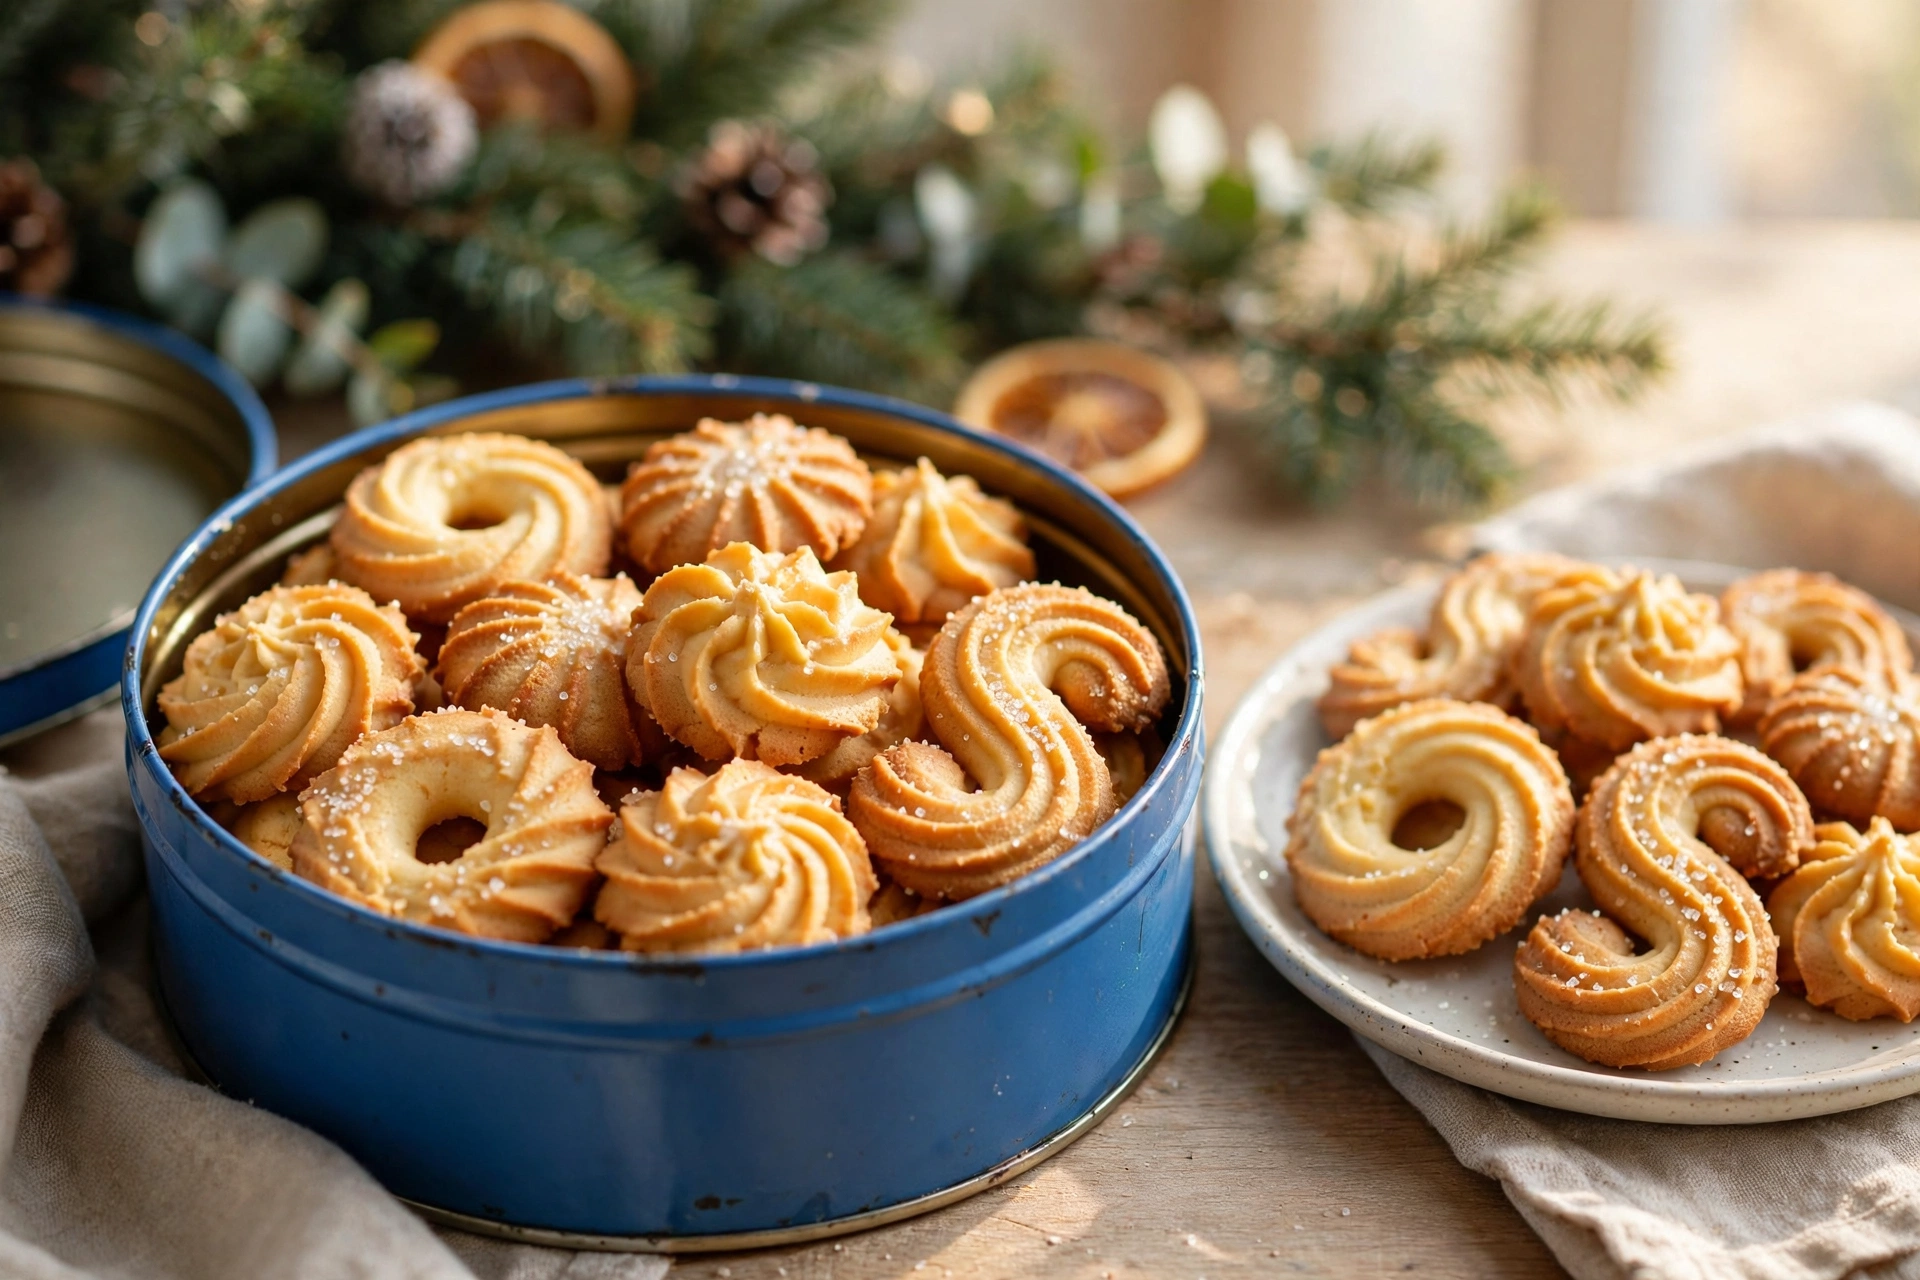
Danish butter cookies are the ones everybody remembers from the round blue tin on a grandmother’s counter: pale gold rings, rosettes and S curves with ridges sharp enough to catch the light. Baked at home, they are that memory with better butter and a fresher snap.
There is no rolling, no cutting and no chilling of dough logs. One soft dough goes into a piping bag, comes out in five classic shapes, and bakes in about twelve minutes, which makes a full tin a one afternoon project.
The recipe below is the base version I bake every December, plain vanilla with a whisper of almond. It is also the version that survives gift giving best, because these cookies keep for three weeks in a tin and travel without breaking.
The Ridges Are Not Decoration
Danish butter cookies work because the ridges multiply the surface of every cookie. Each groove browns a fraction more than the valleys beside it, so a small cookie delivers crisp edges and a tender center in the same bite.
The sugar blend is chosen for that contrast. Powdered sugar dissolves into the butter and keeps the crumb fine and melting, while a smaller share of granulated sugar gives the ridges their faint crunch and sparkle under coarse sugar.
Egg yolk, rather than a whole egg, keeps the dough rich without adding water. Extra water would steam in the oven, soften the ridges and spread the shapes; yolk alone gives color and tenderness with almost no spread.
A spoonful of cornstarch guards the texture from the other side. It softens the flour’s gluten so the snap stays delicate instead of hard, the difference between a bakery cookie and a cracker wearing a costume.
The style itself is old Danish baking. According to Wikipedia’s article on butter cookies, Danish butter cookies have been exported in their famous tins for generations, which is why the shapes are recognized on sight all over the world.
The piping bag is the last piece of engineering. A large open star tip cuts the ridges into the dough as it leaves the bag, so the shape you pipe is the shape that bakes, provided the dough is soft enough and the chill holds it.
A Clean Snap, Then Pure Butter
A proper Danish butter cookie breaks with a short, clean snap, never a bend and never a crumble into sand. The sound is quiet but definite, and it is the fastest test of whether the bake was right.
The flavor is deliberately simple: butter first, vanilla rounding the middle, and the faintest almond warmth at the end. Nothing competes, because in a cookie this small, one loud flavor would drown everything else.
The crumb should look fine and even when you break one open, pale gold all the way through with no darker core. A translucent center means the sheet needed two more minutes; a deep gold edge means it got five too many.
Temperature changes the experience more than people expect. From the tin at room temperature they are crisp and fragrant; chilled, they turn firmer and almost shortbread like, which some of us quietly prefer with coffee.
Coarse sugar is not garnish here. Its big crystals survive the oven, so the tops sparkle and the first bite carries a tiny crunch before the cookie gives way to butter.
On a mixed holiday plate, these are the plain looking cookies that disappear first. My pizzelle bring the lace and the chocolate bakes bring the drama, but the butter rings are what hands reach for twice.
One Dough, Five Shapes, One Afternoon
The joy of this dough is that one batch fills a tin with variety. Rings, rosettes, S curves, pretzel twists and plain fingers all pipe from the same bag in the same session, and nobody believes they took one bowl.
Speed is the second gift. Once the first tray is piped, the rhythm settles: pipe, chill, bake, and pipe the next tray while the first one cools. Thirty six cookies move through the oven in under an hour of real work.
They are also the friendliest cookie to hand to a beginner. There is no dough to roll evenly and no cutter to flour; if a shape comes out wobbly, it goes back in the bowl and gets piped again, no harm done.
For a cookie exchange, one double batch fills two gift tins with all five shapes. They stack neatly, weigh almost nothing, and need no glaze that could smudge in transit.
They hold their own beside fancier company. In my December tin they sit next to the whipped shortbread cookies and the easy Christmas spritz cookies, three kinds of butter in three different textures, which is its own kind of abundance.
The Stiff Dough Rescue
Every baker meets the same wall once: the dough will not move through the tip, the bag strains, and piping feels like a workout. The rescue is simple, and it starts before the bag is ever filled.
First, butter temperature. The butter must be soft enough to leave a deep fingerprint, but not greasy or melted at the edges. Cold butter is the single most common cause of a dough that fights the bag.
Second, the flour measure. Spoon the flour into the cup and level it; a scooped cup can add two extra tablespoons, which is exactly enough to turn a pipeable dough into cement. Weighing is even better, 255 grams for this recipe.
Third, milk, added with restraint. If the mixed dough feels like stiff frosting that barely moves, beat in whole milk one teaspoon at a time. Most batches need none; a dry kitchen or a heavy flour hand might need two or three.
Work in small fills, no more than half a bag at a time. A stuffed bag needs brute force and warms the dough with your hands; a half filled bag pipes with a gentle squeeze and keeps the ridges cold and sharp.
What Goes Into the Dough
The list is short and every item earns its place: butter, two sugars, one yolk, vanilla, a whisper of almond extract, flour, cornstarch and salt. Nothing here hides, so let the butter be one you enjoy on toast.
The almond extract is optional but traditional. A quarter teaspoon will not make the cookies taste like almonds; it adds the warm bakery note that people recognize from the tin without being able to name it.
Coarse sugar goes on before baking, not after, so the oven sets it into the ridges. Pearl sugar works too, though it reads more rustic and suits the fingers and S curves best.
- 1 cup unsalted butter, softened but still cool to the touch (226 g)
- 1/2 cup powdered sugar
- 1/4 cup granulated sugar
- 1 large egg yolk, at room temperature
- 2 teaspoons vanilla extract
- 1/4 teaspoon almond extract (optional)
- 2 cups plus 2 tablespoons all-purpose flour, spooned and leveled (255 g)
- 1 tablespoon cornstarch
- 1/2 teaspoon fine sea salt
- 1 to 3 teaspoons whole milk, only if needed
- 2 tablespoons coarse sugar, for the tops
Piping and Baking, Step by Step
- Beat the butter, powdered sugar, granulated sugar and salt on medium speed for 2 to 3 minutes, until pale, fluffy and visibly lighter. Scrape the bowl once halfway.
- Beat in the egg yolk, vanilla and almond extract until fully combined and glossy, about 30 seconds.
- Add the flour and cornstarch. Mix on the lowest speed just until no dry flour shows. The dough should feel like very thick frosting; if it feels stiff and crumbly, beat in milk one teaspoon at a time.
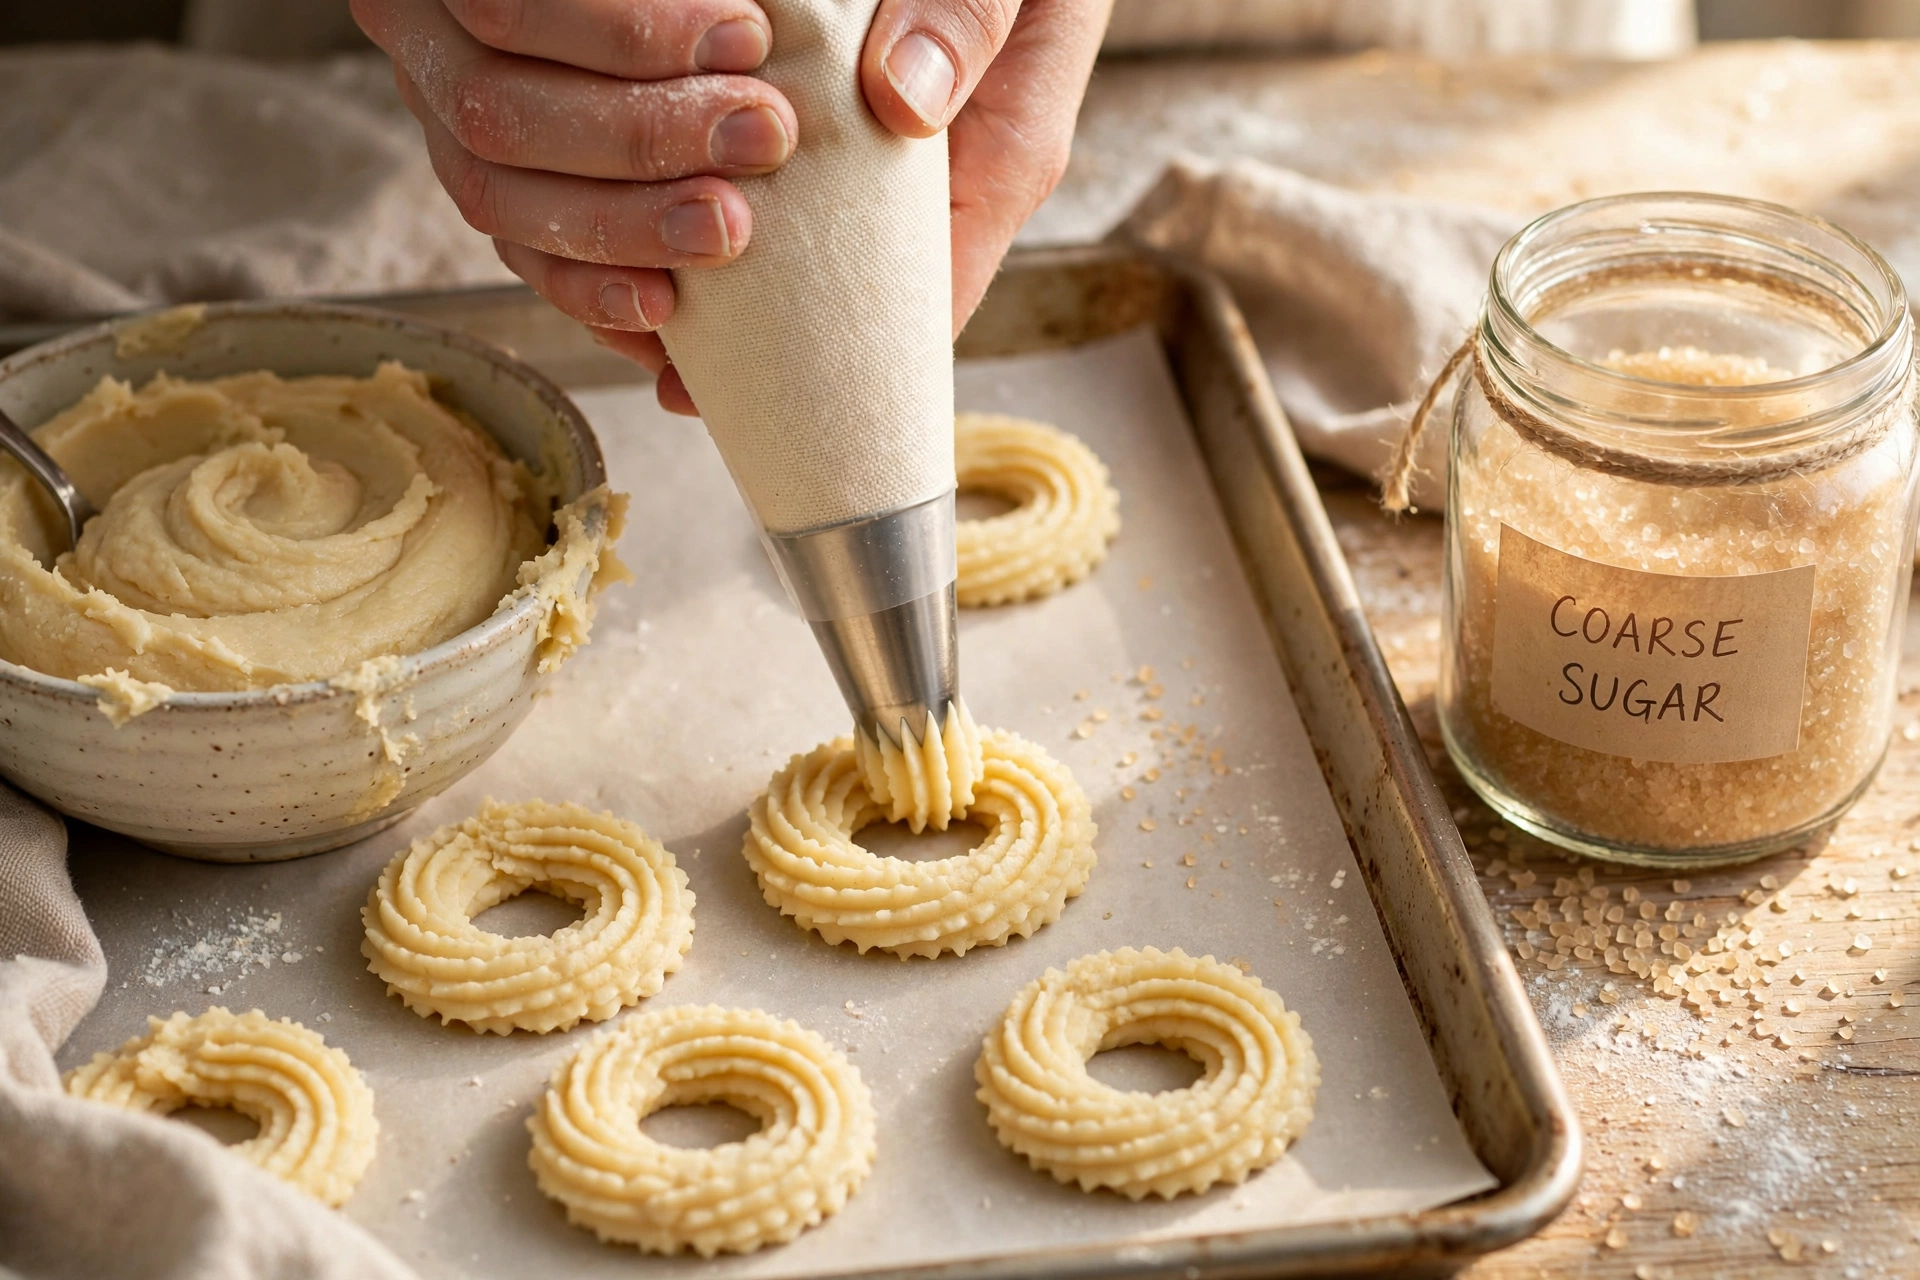
- Fit a sturdy piping bag with a large open star tip and fill it only halfway. Pipe onto parchment lined sheets: rings of about 2 inches, tight rosettes, S curves, pretzel twists and 3 inch fingers, spaced 1 inch apart.
- Sprinkle the tops lightly with coarse sugar. Chill the piped sheets for 15 minutes; this short rest is what keeps every ridge sharp in the heat.
- While the trays chill, heat the oven to 350 degrees. Bake one sheet at a time for 11 to 13 minutes, until the edges are light gold and the centers are still pale.
- Rest the cookies on the sheet for 5 minutes, then move them to a rack to cool completely. They crisp as they cool, so judge the snap on a cold cookie, not a warm one.
- Repeat with the remaining dough, letting each used sheet cool before piping on it again. Warm sheets melt ridges before the oven ever sees them.
Keep the Ridges Sharp
Danish butter cookies keep their ridges for three reasons: soft dough, a large tip and a cold tray going into a hot oven. Lose any one of the three and the shapes relax into ordinary rounds.
Tip size is the quiet variable. A small star tip forces the dough through a narrow opening, tears the surface and produces ridges too fine to survive baking. A large open star, about half an inch across, is the whole secret.
If the ridges on a test cookie melt, the fix is almost never more flour. Chill the next tray for ten extra minutes and check that the oven is fully preheated; a slow oven gives butter time to slump before the structure sets.
Pipe with the tip held close to the sheet, almost touching. Dough dropped from a height stretches and thins, and thin spots bake dark while the rest is still pale.
One shape per tray is a small discipline that pays off. Rings and rosettes finish together, but fingers run a minute longer; mixed trays always sacrifice one shape or the other.
Chocolate, Cherry or Almond
The classic finish is the one already written: coarse sugar before the oven and nothing after. It is the version that tastes most like the tin, and the one I ship to family because nothing can smudge or melt on the way.
For a chocolate path, dip half of each cooled cookie in melted dark chocolate and set it on parchment until firm. The bitter edge against the sweet butter is the combination most often requested at my own table.
A cherry center suits the rings. Press a small candied cherry half into the middle of each ring before the chill, and the tin gains the red and gold look of the old Christmas assortments.
The almond variation folds a half cup of finely ground blanched almonds into the flour and drops the almond extract. The cookies bake a shade nuttier and a little more tender, closer to the Danish vanillekranse sold in Copenhagen bakeries.
For an orange tin, beat a teaspoon of finely grated orange zest into the butter and skip the almond. The cookies sit beautifully beside snowball cookies in a gift box, citrus against powdered sugar.
Three Weeks in the Tin
Cool the cookies completely before the tin, without exception. One warm cookie steams the whole batch, and butter cookies trade their snap for staleness faster than almost any other bake.
In a metal tin at room temperature, layered with parchment, they keep their snap for 3 weeks, which is why they anchor my gift baking in early December. Keep the tin away from spiced neighbors; butter absorbs strong flavors through the air.
Freeze baked cookies for up to 3 months in a rigid container. Thaw them uncovered at room temperature and they will taste freshly piped; ten minutes in a 275 degree oven restores any that softened.
The dough itself does not love the freezer, since a thawed dough pipes unevenly. If you want a head start, pipe the shapes onto a sheet, freeze them solid, bag them, and bake from frozen with one extra minute.
For mailing, pack the tin tight with parchment between the layers and no room to slide. These are among the sturdiest travelers in the whole Christmas repertoire, and they arrive with their ridges intact.
Better Than the Tin You Remember
Danish butter cookies ask for one bowl, one bag and about an hour, and they return the most nostalgic cookie of the season, fresher and more buttery than any tin on a store shelf.
Pipe one batch early in December, learn how the dough should feel and how pale the centers should stay, and the blue tin on your counter will be your own from now on.
Danish Butter Cookie Questions, Answered
Why is my Danish butter cookie dough too stiff to pipe?
The butter was too cold or the flour was scooped instead of spooned and leveled, which can add two extra tablespoons. Beat the dough a minute longer, then add whole milk one teaspoon at a time until it feels like very thick frosting; most batches need one or two teaspoons at most.
How do I keep the ridges from melting flat in the oven?
Chill the piped trays for a full 15 minutes and bake in a fully preheated oven on cool sheets. A large open star tip also helps, because deep, bold ridges survive the heat far better than fine ones from a small tip.
Can I make Danish butter cookies without almond extract?
Yes. The almond extract is a background note, not a main flavor, and the cookies are excellent with vanilla alone. For a different warmth, replace it with a teaspoon of finely grated orange or lemon zest beaten into the butter.
Why did my cookies spread into each other on the tray?
The dough was too warm or the butter was nearly melted when beaten. Space the shapes a full inch apart, chill the tray before baking, and never pipe onto a warm sheet; a used sheet should cool completely before it is loaded again.
How long do Danish butter cookies stay crisp in a tin?
About 3 weeks at room temperature in a metal tin with parchment between the layers, as long as the cookies went in completely cool. If they soften, 10 minutes in a 275 degree oven brings the snap back.